Sun-Dried Tomato Pesto

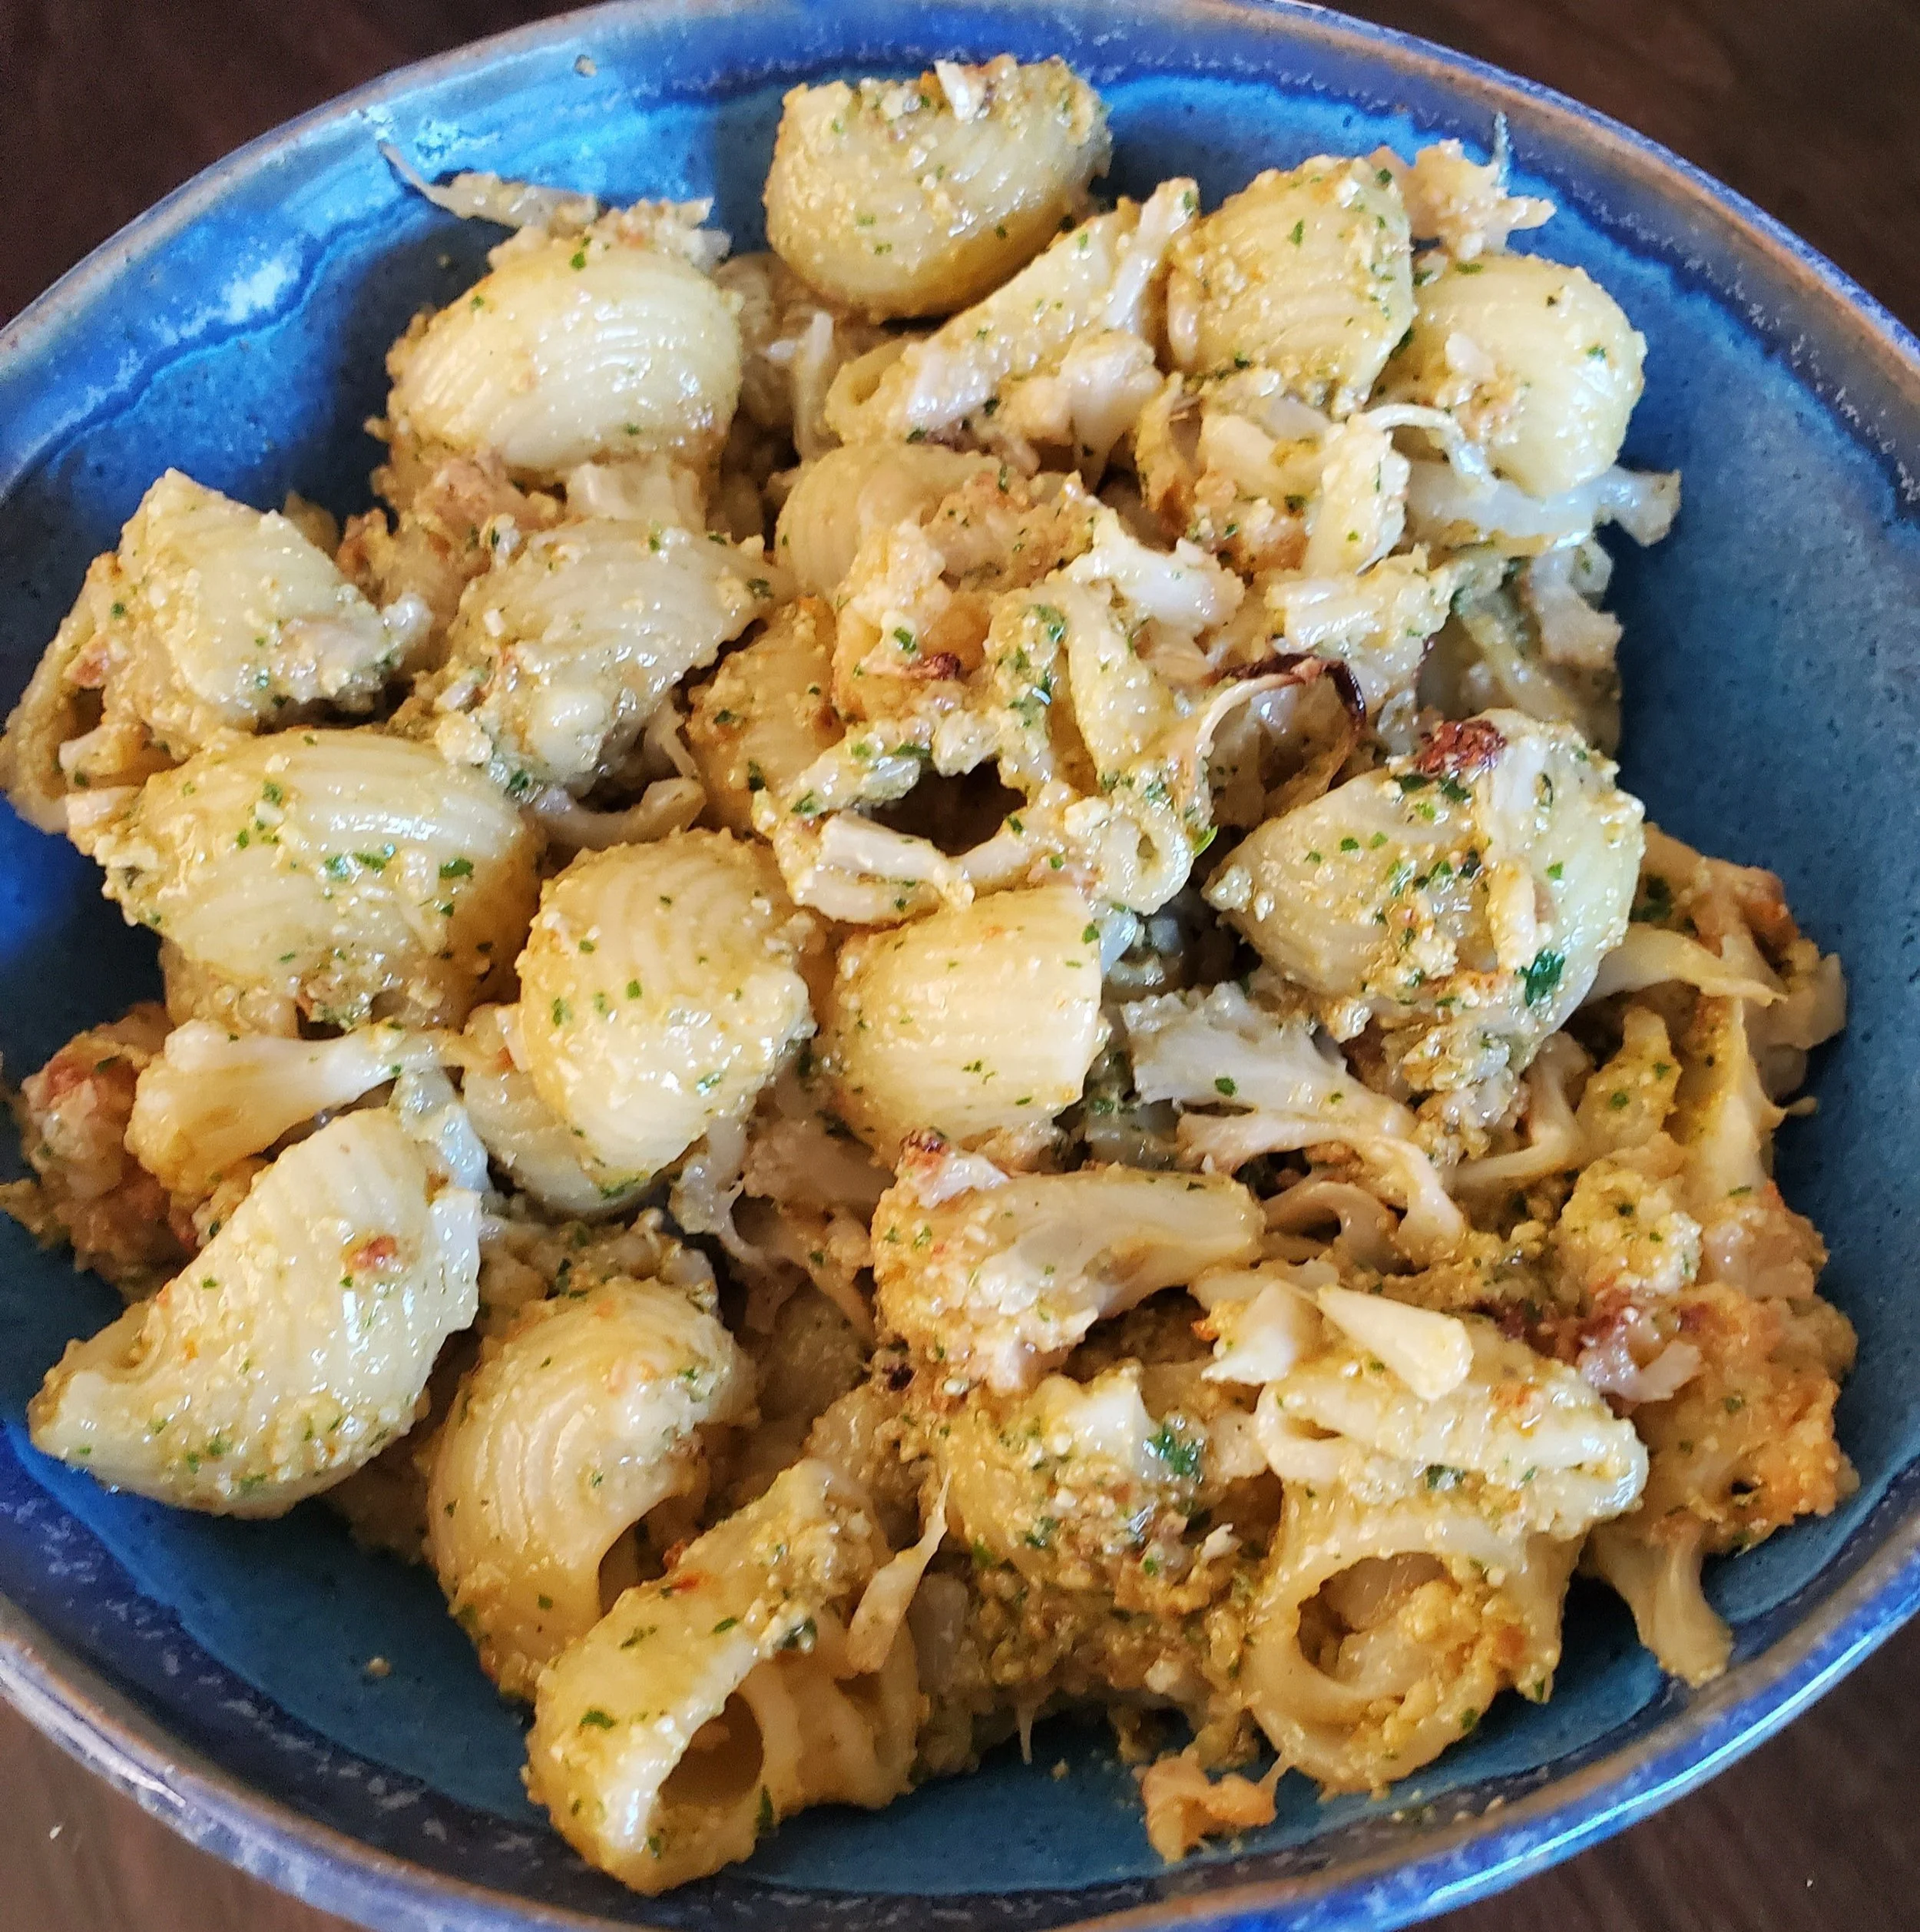
We love this sun-dried tomato pesto on pizza. It also goes great on pasta (as pictured below) or served as a dip. When it’s in season we like to eat a pesto that is heavy on basil. We’ve also made this with just a couple of sprigs of basil and it still tastes great, so if you don’t have much basil feel free to make the dish with less. This pesto is a delicious spreadable sauce good for pizza or sandwiches without adding the optional water. However if you want a thinner sauce for example for a dip or for pasta sauce, then all you need to do is add the optional water.

Serves: makes about 10 oz of pesto

Time: 30 minutes, 5 minutes active time

Ingredients

1/2 cup sundried tomato

1/2 cup cashews

basil, we used 1.5 cups packed

2 tbsp lemon juice

2 garlic cloves

1/4 cup olive oil

salt and pepper to taste

(optional) up to 1/4 cup of water depending on the consistency you are going for


If your sun-dried tomatoes are dried, soak them in hot water with the cashews for 25 minutes. If your sun dried tomatoes are packed in oil, still soak the cashews but you do not need to soak the tomatoes. Drain the tomatoes and the cashews and put them with all the other ingredients into a food processor. Blend on high until smooth, stopping to scrape the sides of the bowl down if necessary. Salt and pepper to taste. Enjoy!

Herbed Cucumber Salad

We love this summery, cooling cucumber salad. It is herbaceous, bright, and fresh. It is great to put in wraps, stir into hummus, or eat as a side. Quick to make, it adds a real punch of flavor to our summer meals.

Makes: enough to top 6 sandwiches

Time: 15 minutes

Ingredients

1 1/2 cup diced cucumber

1 small tomato, optional

1 1/2 tbsp lemon juice

salt

1/4 cup minced parsley

1 tbsp minced green part of green onion

1/4 cup minced mint


Wash and finely dice the cucumber. If using tomato, first cut it in half. If it is meaty, finely dice and add to cucumber. If it has a good bit of water, scoop out the water and seeds before dicing to decrease the liquid in salad. Finely mince the herbs. Toss the herbs, tomato (if using), cucumber, salt and lemon juice in a bowl. Refrigerate before enjoying!

Hummus

If you have a food processor (or blender) this is both easy to make and usually much less expensive then buying it at a grocery store. Plus, you can add your own flavors/toppings to mix up the experience. Check out our suggestions for this below and we’d love to hear in the comments your favorite additions to a basic hummus recipe.

Serves: 4

Time: 10 minutes

Ingredients

3/4 cup dried chickpeas* or 1 can chickpeas

3 cloves garlic

1.5 tbsp lemon juice

2 tbsp olive oil

Water

2 tbsp tahini

1/2 tsp cumin

1/2 tsp Hot sauce or to taste

Pinch salt


If you are using dried beans, cook them*. Once you have cooked the beans, drain and rinse them. Add all the ingredients to a food processor (or blender) and process until smooth.

You can add all sorts of delicious things to this hummus, or keep it plain and top with something yummy. Some examples of things you can add to the hummus or top it with are pine nuts, fresh herbs, roasted red pepper, roasted garlic, harissa, or olives! Serve with bread, crackers, or fresh vegetables or use on a sandwich. Enjoy!


*Cook the chickpeas using an Instant Pot or on the stove. (If you are using canned chickpeas skip to step 2)

In the Instant Pot: Add 3/4 cup of dried chickpeas to the pot. Cover the beans with water (in the small Instant Pot this is about 6 cups of water), season with 1 tbsp kosher salt, 1 tbsp cumin, 1 tbsp garlic powder, and 1/4 tsp cayenne. Set the Instant Pot to pressure cook for 35 minutes letting depressurize naturally.

On the stove: If you don’t have an Instant Pot, you can easily cook chickpeas from scratch with a little planning. First you will need to soak the chickpeas which can be done one of two ways. 1. you can soak them overnight making sure they have enough water and space to double in size or 2. you can put them in a pot and bring to boil, then turn off the water and let soak for one hour. Again, make sure you have enough water and space that they can double in size. Once you have soaked your beans, rinse them and then put in a pot with salty water. These will be cooking for about 2 hours so you don’t want as much salt as you would use for pasta, but you do want to add enough that you can taste the salt in the water. The best way to get good at this is to practice. Each time you salt the water, taste it and when the beans are done taste them to see if they are well salted. A well salted bean should taste flavorful but not salty. If it tastes like you are eating salt, you added too much. If the bean lacks flavor then you didn’t have enough salt. For this recipe, also add 1 tbsp cumin, 1 tbsp garlic powder, and 1/4 tsp cayenne to the chickpeas as they cook. Cook the chickpeas until they are soft but not falling apart (this will take 1.5-2 hours). We recommend checking the beans at about an hour and then every 20 minutes until they are soft but not disintegrating. Make sure your pot has enough water as I have definitely cooked all the water off before and burnt the beans!

Cranberry Sauce

Woof. Election day is here! As Matika Wilbur and Adrienne Keene say “Vote (if you want to & can)”. If you haven’t listened to this most recent All My Relations podcast episode, we highly recommend it.

We love cranberries and particularly this recipe because the bright acidity can balance out a plate of fall foods. The cheerfulness of this acidity is a great pick me up, and right now we’re both needing that. We wrote the recipe to be very sour because that’s how Anne likes it, however we recommend adding as much agave/sugar/maple syrup as you like until this is the perfect sweetness for you.

processed_20201005_175938.jpg
processed_20201005_175942.jpg

Serves: 4-6 as a topping

Time: 3 hours, 15min active

Ingredients

12oz cranberries

zest of half an orange

juice of half an orange

1 cup apple cider (or juice)

1 cinnamon stick

5 cardamom pods

8 cloves

1/8 tsp salt

sweetener to taste (sugar, agave, maple syrup, etc.)


We recommend you tie the cardamom pods and cloves in a spice sachet before putting them into the pot. This makes it easier to pull out at the end. Alternatively, you can leave the spices in the final product, and be aware they will change the texture/experience.

Combine all ingredients in a saucepan over med high heat and bring to a boil. Turn down to a simmer and simmer until thick. We recommend about 3 hours, but this is flexible depending on how thick you like your sauce. This can be removed from the heat at anytime and you can re-heat to continue thickening later if you need to take a break in the cooking process.

2-4 tbsp of agave creates a punchy tart cranberry sauce experience, add more agave until you get to your perfect level of sweetness!

processed_20201005_175929.jpg

Mushroom Gravy

Fall cozy food season has arrived here and we are loving this crowd favorite mushroom gravy. It is creamy, umami, and pairs well with mashed potato, roasted cauliflower, and cranberries.⁠

processed_20201005_183402.jpg

Makes: 20 oz

Time: 30 minutes

Ingredients

8 oz cremini mushrooms, sliced

1/2 tsp black pepper

1/2 tsp salt

Most of a head of roasted garlic (you can save a couple of cloves to eat on bread or use the whole head)

1 1/4 cups hot vegetable broth (gluten-free option, soy-free option)

1/2 tsp apple cider vinegar

1/2 cup mashed potato or 1/2 of a medium waxy potato, roasted or boiled (if you can’t eat nightshades, parsnips work well as a replacement for the potato)


Saute the mushrooms until browned, over medium heat, about 20 minutes, adding pepper after 15 minutes.

In a blender, combine all the ingredients including the cooked mushrooms. Blend until smooth. For a thicker gravy, add more potato. Season to taste.

processed_20201005_183325.jpg

Garlic Scape Spread

Scapes are in season and we learned to make this spread from Laura at River Bank Farm. We love making a bunch of this and keeping it in the fridge for delicious local garlic all summer long. Often we use scape spread as a replacement for minced garlic, which cuts down on cooking time. It is also a delicious spread to add to sandwiches.

scapes.jpg

Serves: 16 oz

Time: 10 min

Ingredients:

Scapes (about two handfuls), coarsely chopped

Olive oil (1/4 cup or less)


Blend the scapes and olive oil in a food processor until fully pureed. Store the mixture in a jar in the fridge and use a tablespoon as a replacement for 3 cloves of minced garlic in any stir fry, salad dressing, soup, stew, etc. If you have an abundance of scapes, make some extra and store it in the freezer to use when you run out of your first batch.

scapes 2.jpg

Cashew Cheese

This cashew cheese recipe is easy to make and has so many uses! It can be a delicious spread on bagels (add some chives to make it super fancy), pour it over some pasta for an easy cream sauce, put it on pizza for a white sauce, add it to soups for some creamy goodness, or add to some mashed potatoes for that cheesy deliciousness. Since I make nut milk a couple times a week, I usually use the pulp from that milk as a base for my cashew cheese. If you don’t have nut milk pulp to use up, don’t worry, simply substitute additional cashew pieces for the pulp.

cashew+cheese.jpg

Serves: 2 cups

Time: 30min (15min active)

Ingredients

1 1/4 cups nut pulp

3/4 cups cashews

1 tbsp olive oil

1/3 cup water

1 tsp salt

1/2 tsp garlic powder

1 small clove garlic roughly chopped

juice of half a lemon (2 tbsp)


Soak the cashews in hot water for 15 minutes.

Combine all ingredients and blend until smooth, scraping down the sides of your blender or food processor as you go. Keeps for 1 week. You can freeze and use later if you don’t need the whole batch.

You can use either a food processor or a Vitamix blender for this. Using a food processor will give the cheese slightly more texture and a Vitamix will make the cheese extra silky/creamy. Both are good! I would not recommend trying to make this cheese in a blender that isn’t high powered, as the nuts can be hard on the motor and the cheese will come out with a strange texture. Note, I don’t always soak the cashews and can say from first hand it isn’t 100% necessary when using a Vitamix. It does however help take care of your equipment and can make the final product creamier, so I do recommend it, if you have the time.