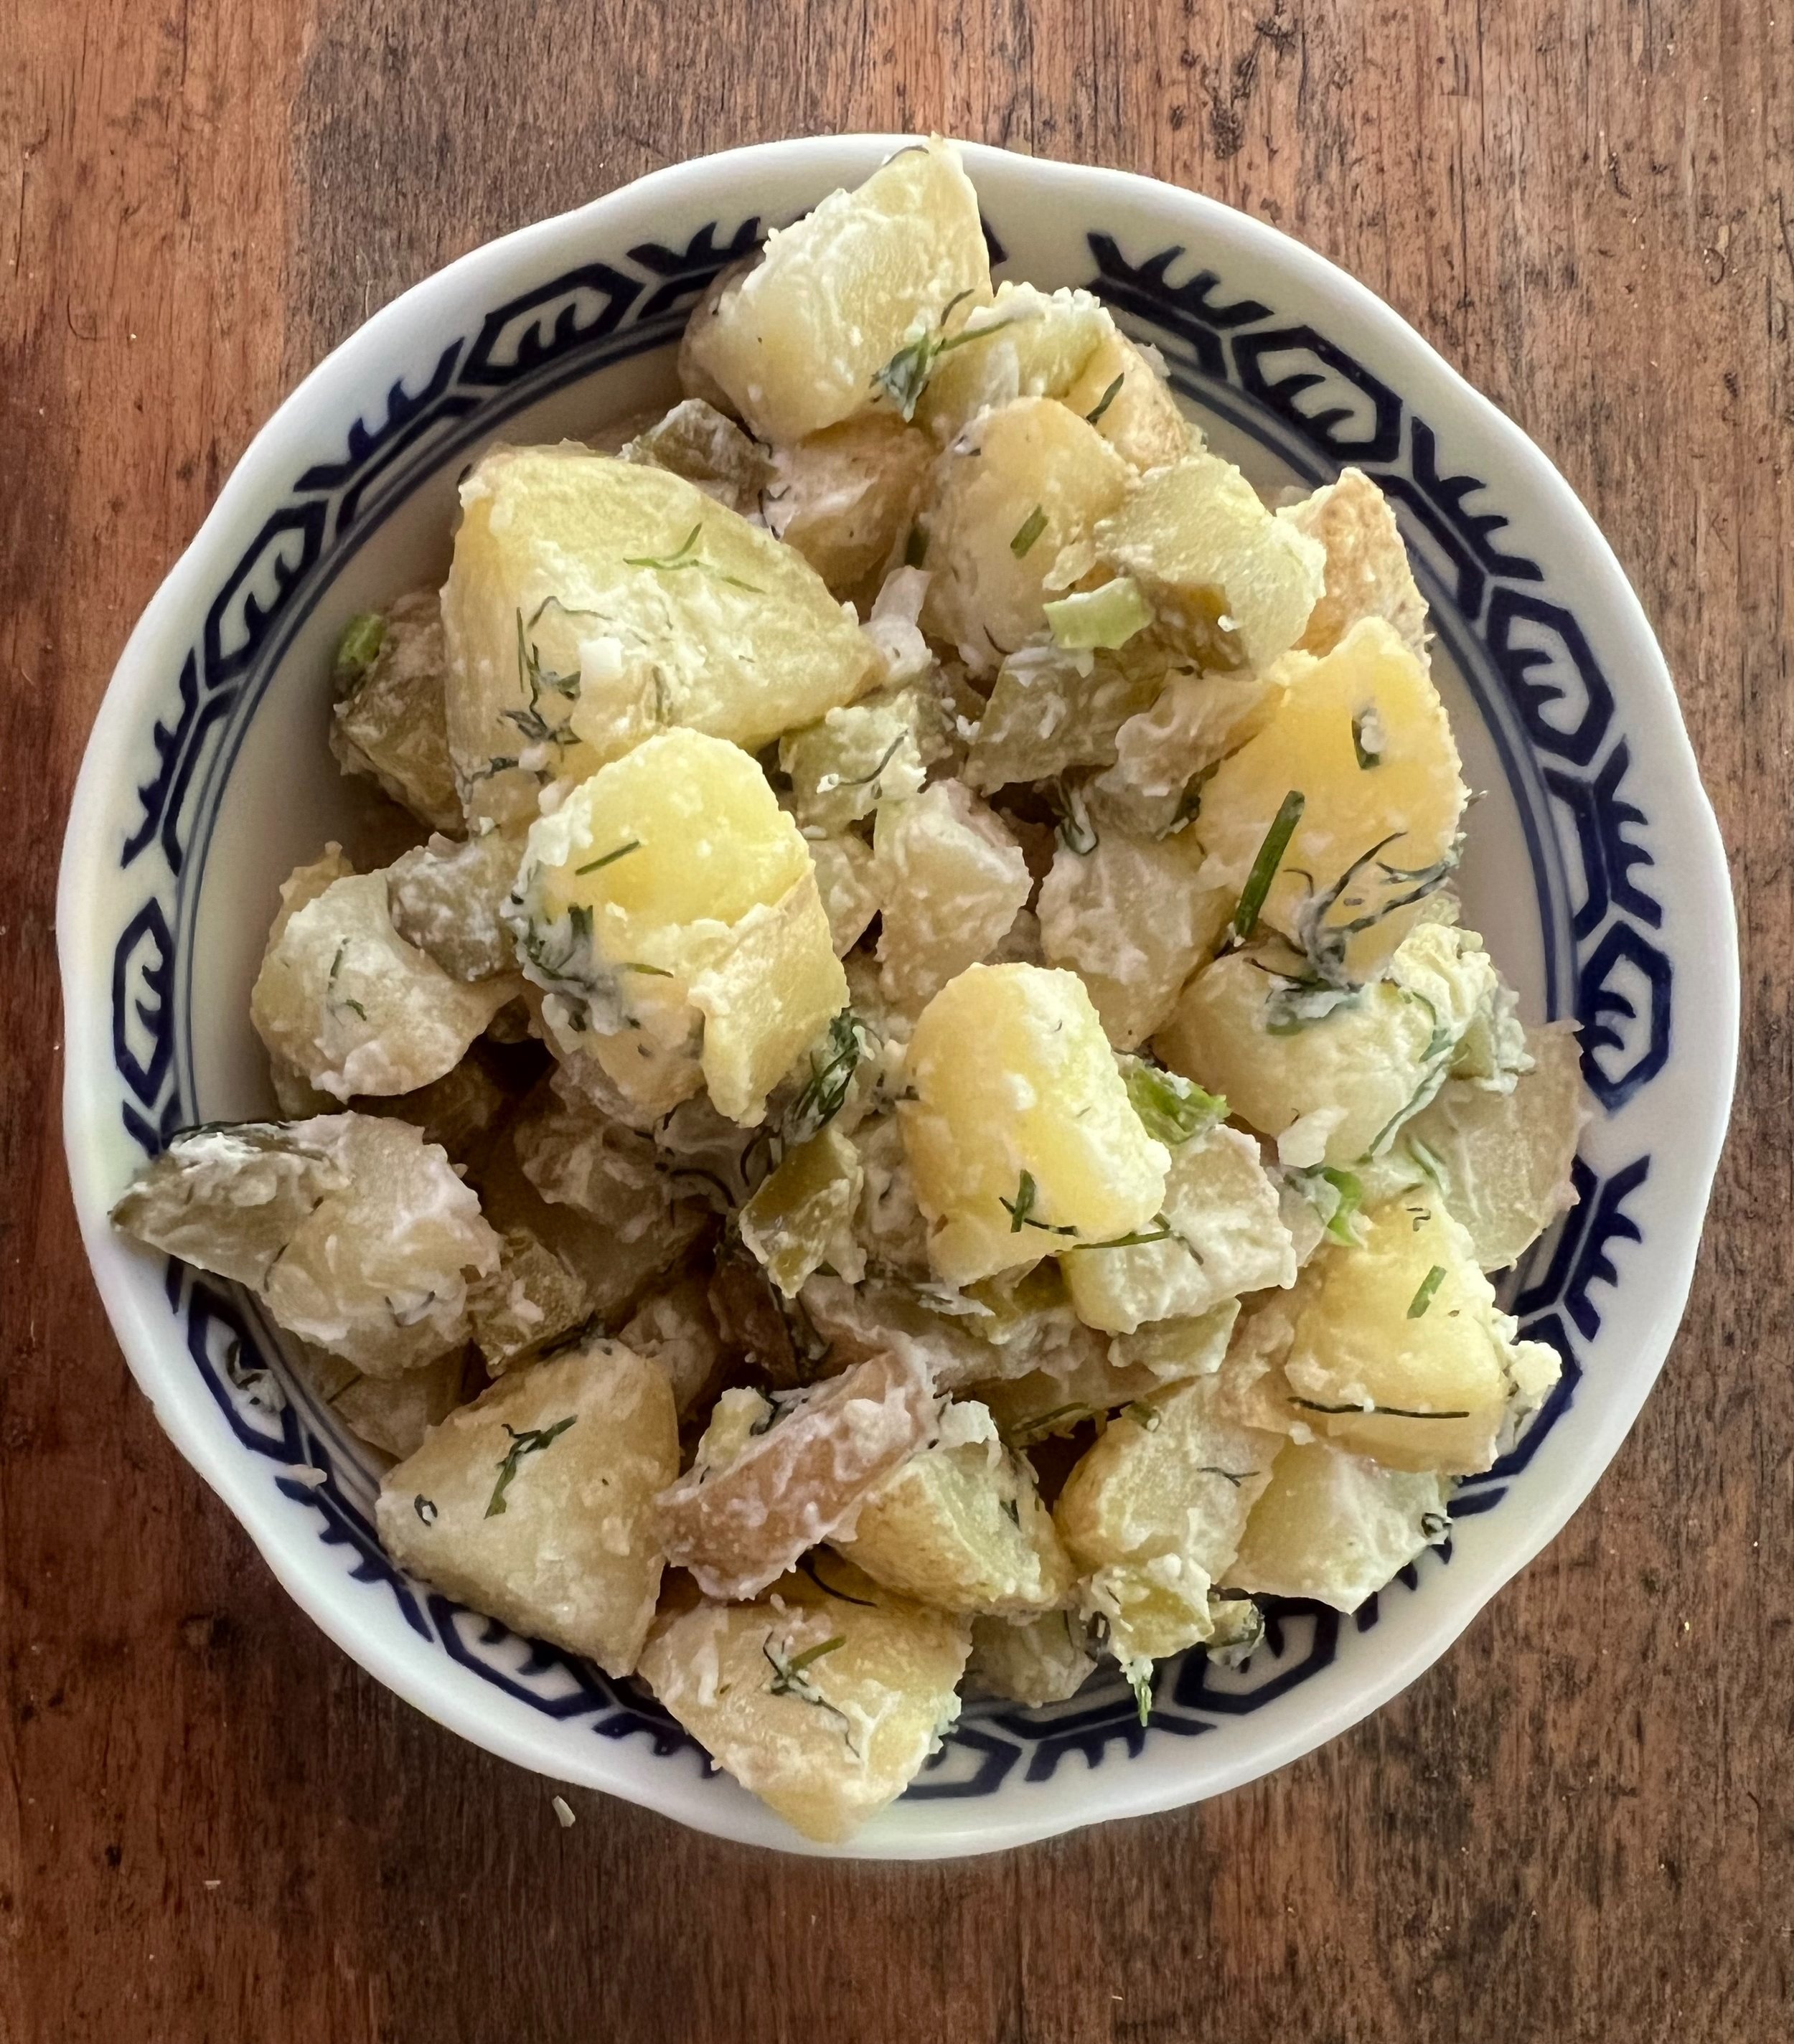
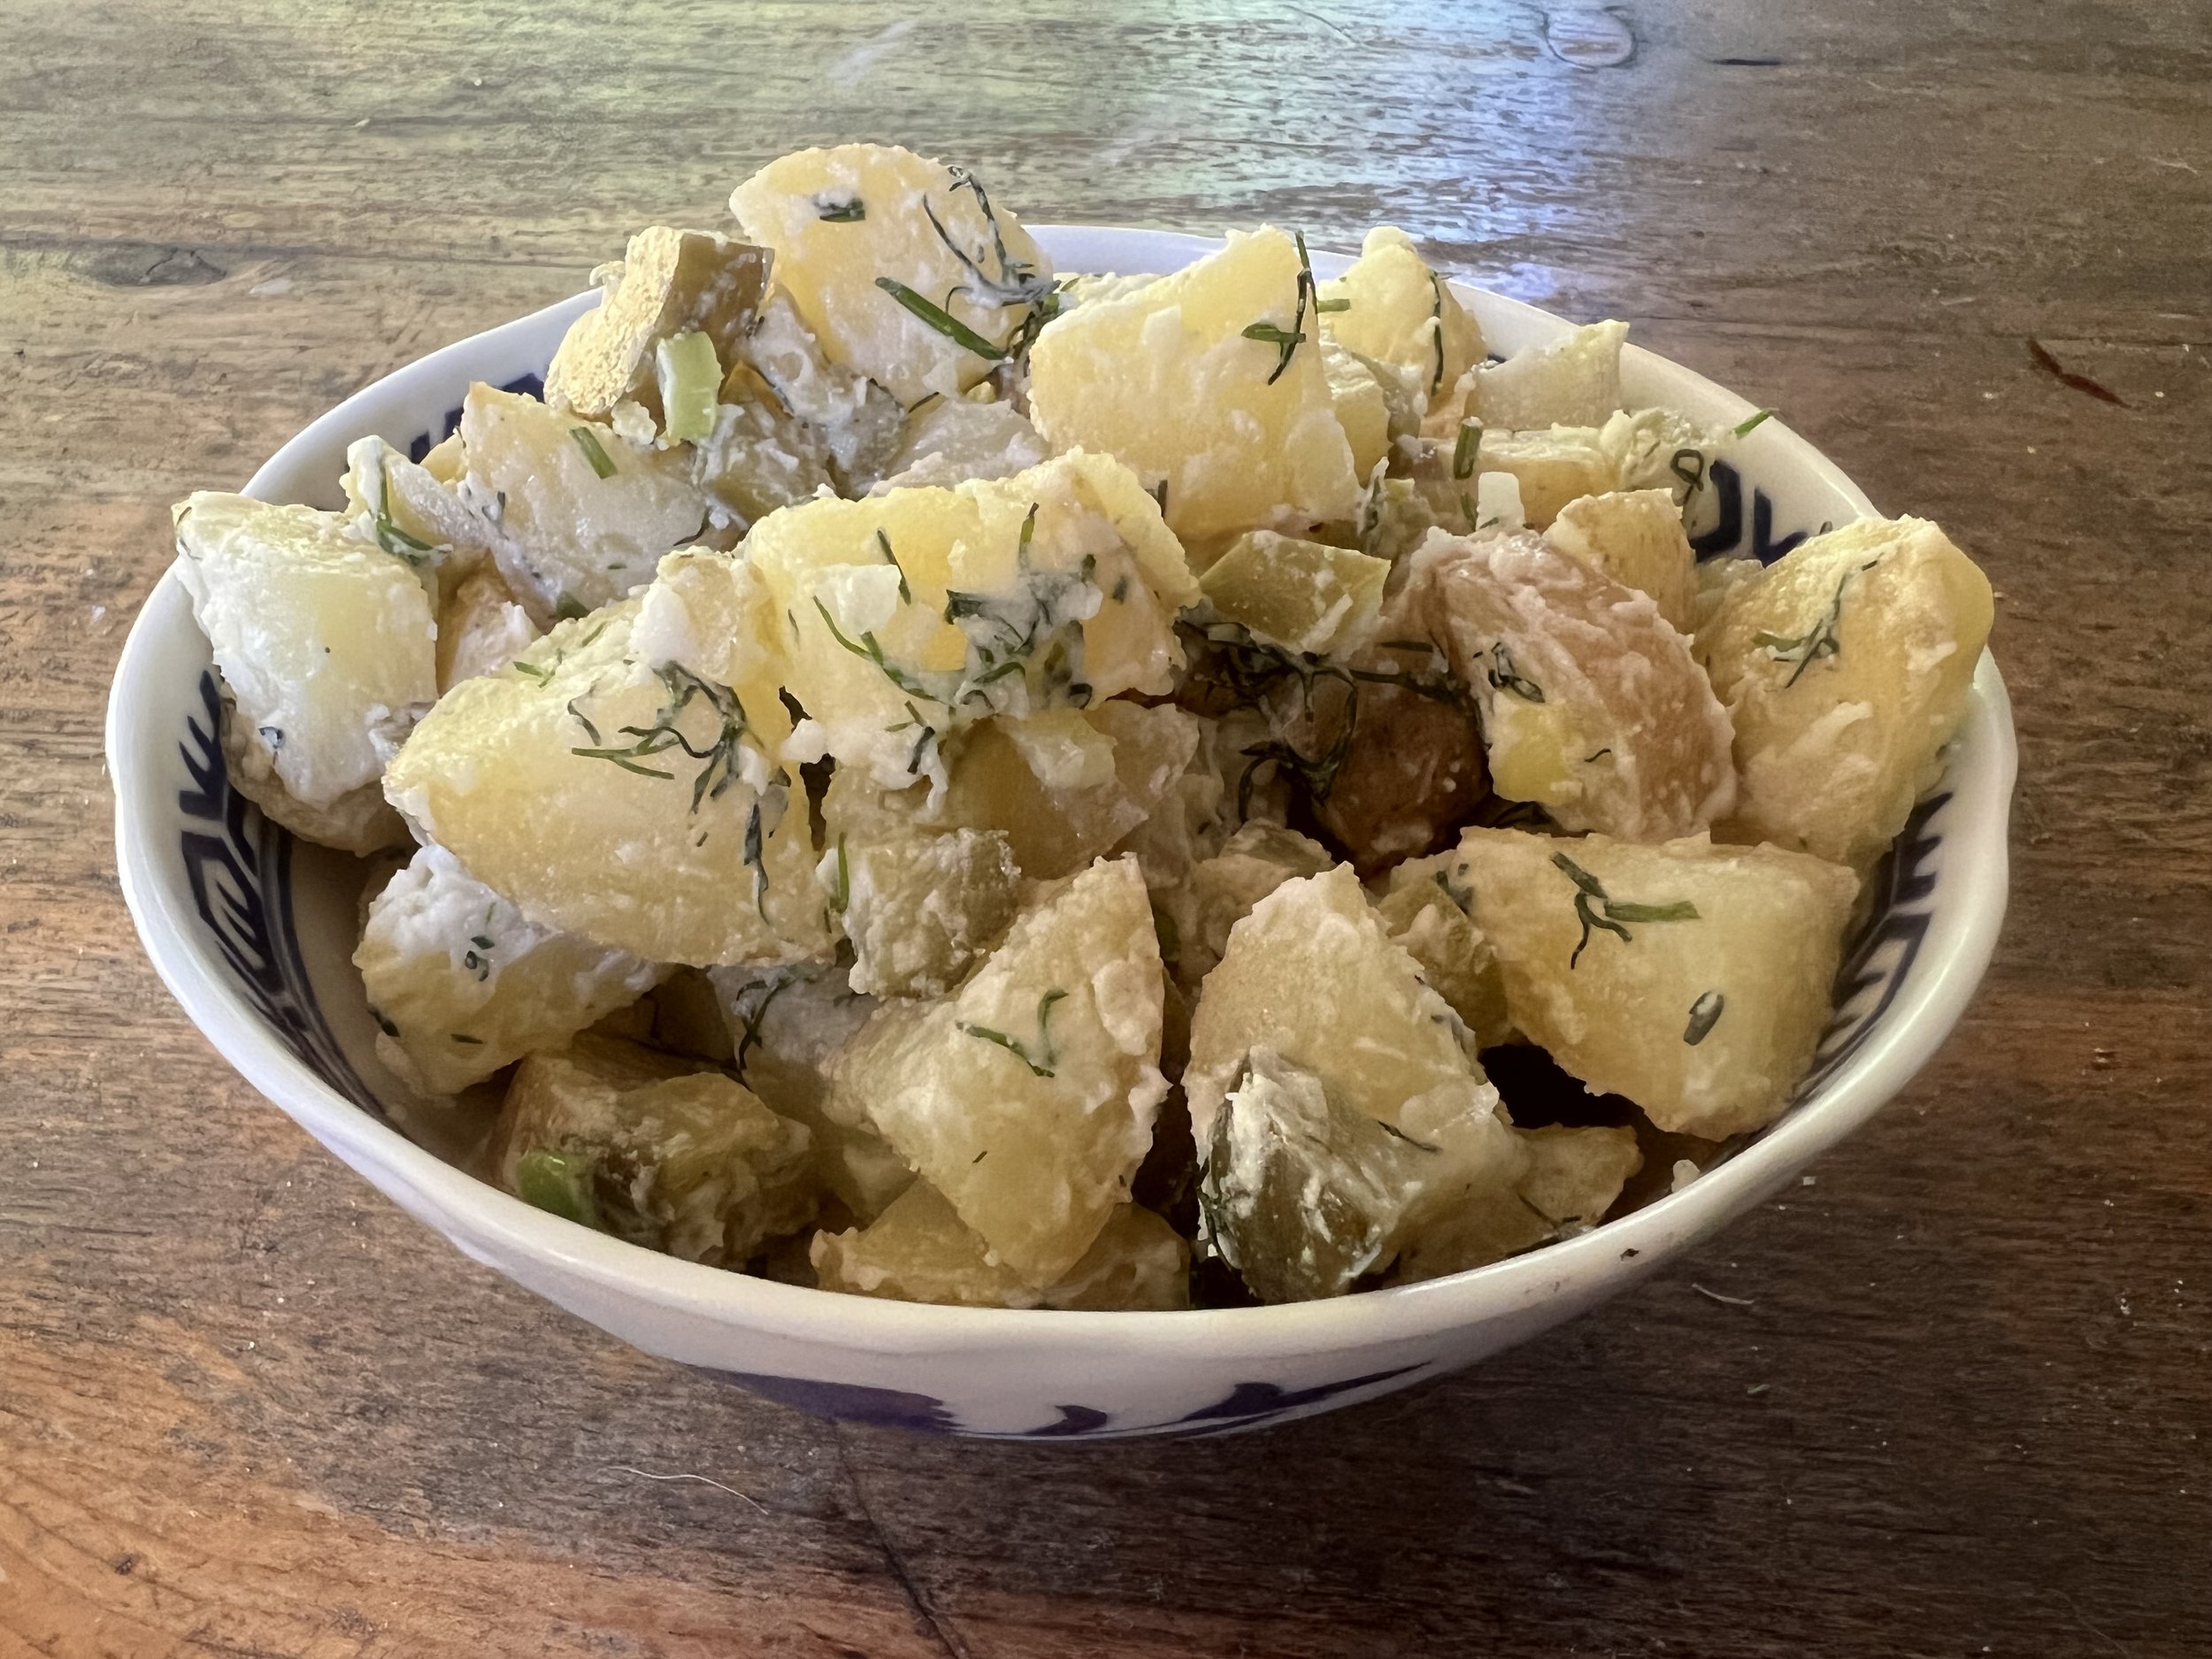
Potato Salad

This potato salad recipe is the foundation that Camille uses to start a potato salad. She then adds other ingredients based on what she has in the house. If you make it just as it’s written it is delicious just like that, and feel free to experiment and add more things in as feels good to you. They love it because it’s fast to make, delicious to eat, and can be mixed up to use up whatever you have on hand. You can also substitute some of the ingredients to match what you have available, for example if you don’t have the garlic aioli you can substitute mayo, or you can use other fresh herbs in lieu of dill.

Serves: 4 as a side

Time: 30 minutes

Ingredients

1.5 lbs waxy potatoes

salt

2 small dill pickles, or 1 large dill pickle

3 tbsp vegan garlic aoili

1 tsp minced raw onion (optional)

2 tbsp fresh dill, minced

1 scallion, minced

1/4 jalapeno, minced (optional)


Wash and chop the potatoes into small bite sized pieces. Boil them in very salty water (like the ocean) until they are tender. Strain and rinse. Slice the pickles into bite sized pieces and chop up the rest of the ingredients. Combine and Enjoy!

Taste for salt on this first bite. If you salt the water a lot you may not have to add any salt to this dish once you combine it. If it’s not salty enough, add salt. If it’s too salty, make some more but under-salt the second batch of potatoes. Alternately you can add in other un-salted ingredients like boiled potatoes or freshly chopped veggies (eg. celery, carrots, or minced cabbage) which will dilute the salt. The more you practice with salting water when you boil potatoes the better you will get at salting perfectly to your liking.

Sun-Dried Tomato Pesto

We love this sun-dried tomato pesto on pizza. It also goes great on pasta (as pictured below) or served as a dip. When it’s in season we like to eat a pesto that is heavy on basil. We’ve also made this with just a couple of sprigs of basil and it still tastes great, so if you don’t have much basil feel free to make the dish with less. This pesto is a delicious spreadable sauce good for pizza or sandwiches without adding the optional water. However if you want a thinner sauce for example for a dip or for pasta sauce, then all you need to do is add the optional water.

Serves: makes about 10 oz of pesto

Time: 30 minutes, 5 minutes active time

Ingredients

1/2 cup sundried tomato

1/2 cup cashews

basil, we used 1.5 cups packed

2 tbsp lemon juice

2 garlic cloves

1/4 cup olive oil

salt and pepper to taste

(optional) up to 1/4 cup of water depending on the consistency you are going for


If your sun-dried tomatoes are dried, soak them in hot water with the cashews for 25 minutes. If your sun dried tomatoes are packed in oil, still soak the cashews but you do not need to soak the tomatoes. Drain the tomatoes and the cashews and put them with all the other ingredients into a food processor. Blend on high until smooth, stopping to scrape the sides of the bowl down if necessary. Salt and pepper to taste. Enjoy!

Herbed Cucumber Salad

We love this summery, cooling cucumber salad. It is herbaceous, bright, and fresh. It is great to put in wraps, stir into hummus, or eat as a side. Quick to make, it adds a real punch of flavor to our summer meals.

Makes: enough to top 6 sandwiches

Time: 15 minutes

Ingredients

1 1/2 cup diced cucumber

1 small tomato, optional

1 1/2 tbsp lemon juice

salt

1/4 cup minced parsley

1 tbsp minced green part of green onion

1/4 cup minced mint


Wash and finely dice the cucumber. If using tomato, first cut it in half. If it is meaty, finely dice and add to cucumber. If it has a good bit of water, scoop out the water and seeds before dicing to decrease the liquid in salad. Finely mince the herbs. Toss the herbs, tomato (if using), cucumber, salt and lemon juice in a bowl. Refrigerate before enjoying!

Early Spring Salad with Orange Dressing

We’re still seeing late season citrus in our local grocery store and we love to add that late citrus to spring veggies that are in season here in the Pacific Northwest. Delicious asparagus, spring peas, and purple radishes with freshly picked greens. We didn’t include amounts of asparagus feel free to use as much or as little as you have or as you want to eat. We use the crispy fava beans as protein in this salad, however if you don’t have them boiled eggs or fried tofu would both be good substitutes.

Time: 40 minutes

Ingredients

For the Salad:

Leafy Greens - early spring options include arugula, mustard greens, baby chard, spinach, radicchio, and pea greens

Asparagus

Radishes

Snow peas

Crispy Spring Onions

Good Bean Sea Salt Crispy Favas and Peas

For the Dressing:

1/2 cup orange Juice

1 tbsp lemon juice

1/2 cup olive oil

1/4 cup water

1/2 tsp mustard

salt and pepper to taste


Move an oven rack to the top shelf in your oven, and turn the oven to the broil setting. Rinse and cut the ends off of your asparagus. Toss in olive oil, salt, and pepper. Layer the asparagus in a single layer on a cookie sheet and broil for 5 minutes. Flip the asparagus and broil for 5 minutes on the other side. The asparagus is easy to burn on the broil setting, so we recommend using a timer and watching them closely. Remove from oven and make the crispy spring onions.

Chop the remaining vegetables and cut or tear the salad greens (if you want to). Put all of the salad dressing ingredients into a jar with a lid and shake until it’s emulsified/fully combined. Add salt and pepper to taste. Add all the salad ingredients to a bowl (except the spring onions). Toss with salad dressing. Top with spring onions and enjoy!

Crispy Spring Onions

We like to fry spring onions (or scallions or green onions) in olive oil until they are crispy and use them as a garnish for many meals. When you do this, you will end up with olive oil left over. This olive oil will have a delicious onion flavor and is good in so many things! We recommend saving this and using it as a replacement for olive oil in a salad dressing, as oil for roasting veggies and potatoes, or dip bread in it for a snack.

Time: 20 minutes

Ingredients

1 bunch of spring onions (or scallions or green onions)

olive oil (varies based on pan size)

salt


Rinse and thinly slice lengthwise the green parts of your spring onion. If there are white bulbs you can save these for another meal.

For this recipe you will need to pour olive oil in a pan until you have a full 3/4 inch of oil in the pan. We recommend using a very small pan so that you don’t have to use as much olive oil. Put your pan at med-low heat and let the olive oil get hot before adding onions. Cook them until they start to brown, turning and stirring constantly to keep them from clumping up. Use a fork to remove them from the oil and cool them on a kitchen towel or paper towel and salt generously. Eat them as a snack, top a salad with them, or use as a garnish in many meals.

At this point you’ll want to keep your olive oil. If you aren’t going to use it immediately, once it cools it would be safer to store it in the fridge until you are ready to use it. Enjoy!

Cilantro Tomato Black Eyed Peas

Hi, Camille speaking here. I love black eyed peas because they are a bean that doesn’t need any soaking to cook from dry! It’s great when I haven’t planned ahead and still want a fairly quick meal (extremely quick if you have an Instant Pot) and still not too long if you are cooking on the stove. When I lived in Senegal, bean sandwiches was a common and delicious breakfast if you had enough money to afford it. This recipe is very similar to the sauced beans that I ate there and would be delicious served on a baguette. We also used them in our Last Chance Veggie Skillet.

Serves: 4 as a side

Time: 25 minutes

Ingredients

1 Can Black Eyed Peas or 3/4 cup dried black eyed peas

1/2 onion

olive oil

2 cloves garlic

1 tbsp tomato paste

1 tbsp oil from Mama Lil’s Peppers

salt

1 cup vegetable stock (or bouillon cube and water), gluten-free option, soy-free option

handful of cilantro


If you are using dry black eyed peas, cook them according to the instructions at the end of this recipe. If you are using canned black eyed peas then open the can and rinse the cooked peas.

Chop the onion so that the pieces are about the same size as the peas. Mince the garlic. Cook the onions on medium heat with olive oil until they begin to become transparent. Add the garlic for an additional minute. Add the hot pepper oil and tomato paste. Stir to coat the onions. Add the cooked beans and stock. Stir well. Bring to a boil and then turn down to a simmer and cook until it’s the consistency that you like, stirring regularly. Wilt the cilantro in. Stir and enjoy!

*Cooking black eyed peas from dry:

In the Instant Pot:

To cook in an Instant Pot, add 3/4 cup of dried black eyed peas to the pot.  Cover the beans with water (in the small Instant Pot this is about 6 cups of water), season with 1 tbsp kosher salt. Additionally if you happen to have the following add these as well: 1 tbsp cumin, 2 tsp garlic powder, and 1/8 tsp cayenne.  Set the Instant Pot to pressure cook for 6 minutes letting depressurize naturally.  Drain and rinse before adding to the dish.

On the stove:

If you don’t have an Instant Pot, you can easily black eyed peas from scratch with no planning. They are a bean that doesn’t need any soaking, yay! Put the black eyed peas in a pot with salty water. These will be cooking for about 45 minutes so you don’t want as much salt as you would use for pasta, but you do want to add enough that you can taste the salt. The best way to get good at this is to practice. Each time you salt the water, taste it and when the beans are done taste them to see if they are well salted. A well salted bean should taste flavorful but not salty. If it tastes like you are eating salt, you added too much. If the bean lacks flavor then you didn’t have enough salt.

Additionally if you happen to have the following add these as well: cumin, garlic powder, and a tiny amount of cayenne. 

Cook the peas until they are soft but not falling apart (this will take about 45 minutes).  We recommend checking the beans at 20 minutes and then every 10 minutes o cook until they are soft but not disintegrating. Make sure your pot has enough water as I have definitely cooked all the water off before and burnt the beans!

Herbed Ranch Dipping Sauce

We love this herbed ranch dipping sauce. It’s great for fresh cut veggies, deep fried tempura tofu or veggies, or anything you would want to dip in ranch sauce!

Serves: dipping sauce for 6-8 people

Time: 45 minutes (15 min active)

Ingredients

1 cup cashews soaked in water for 30 min

1/4 cup water, plus additional if needed

1 and 1/2 tbsp lime juice

1 tsp of lime zest

1 and 1/2tbsp scallion

1/4 cup parsley

2 cloves of garlic, finely minced

1/2 tsp garlic powder

1/2 tsp salt

2 pinches (or some freshly ground) black pepper

pinch of cayenne


Mince the garlic and then sprinkle it with kosher salt and smash it with the side of a knife (being careful not to cut yourself). Then mince the parsley and the scallions.

Blend the cashews, water, lime juice, garlic powder, salt, black pepper, and cayenne until it is smooth and creamy. For this, start with 1/4 cup of water and then add additional water if needed to make it blend well and to achieve a thick liquid texture. Now stir in the minced garlic, parsley and scallions and serve!

The Greatest Vegan Croissants

Anne has loved croissants since they were a small child. They have been working to perfect this recipe for a few years now, and have enjoyed each step of the process. This version makes about a dozen flaky and fluffy croissants completely free of dairy. Making these tasty croissants is quite expensive as it takes more than a block of Miyoko’s. For other recipes we usually suggest Miyoko’s with the option to replace it with another kind of vegan butter. In this recipe the Miyoko’s is essential as we have not had as good a result with any other butter alternative, flavor or texture. Like many pastry recipes, this one requires a lot of control over the temperature of the ingredients. Chilling the butter and dough at regular intervals is essential, as is having a kitchen that is not too warm. It would be difficult to make this recipe on a day that it was warmer than 70 degrees F unless you were working in effective air-conditioning.

Anne used these two (not vegan) recipes as a jumping off point for our recipe:

All Butter Croissants by Sorted Food

How To Make Proper Croissants Completely By Hand by Joshua Weissman

processed_20210311_125802.jpg
processed_20210311_125607.jpg

Makes: 12 croissants

Time: At least 13 hours (1 hour active)

for the dough:

2 tsp active dried yeast

1/4 cup warm water

1/4 cup coconut sugar

3/4 cup almond milk (room temperature)

2 tbsp melted Miyoko’s butter

1 1/2 tsp salt

2 1/2 cups all purpose flour

for the beurrage:

1 cup cold Miyoko’s butter (this is one whole block)

for the wash:

3 tbsp full fat coconut milk (if you don’t want to open a can you can use powdered coconut milk and water for this)


Put the active dry yeast in a small bowl. Add the warm water (should be warm to the touch, but not hot) and a pinch of coconut sugar. Give it a quick stir just to combine. Let it sit on the counter about 5 minutes. It should get a small amount of foam that shows you the yeast is still alive/active. If the yeast doesn’t change at all, you will want to start over using new yeast. This is why water temperature is important, too hot can kill the yeast but too cold won’t activate the yeast. Water that is warm to the touch should be perfect.

Put the flour in a large mixing bowl. Make a well in the flour, and add the yeast mixture. Add the remaining coconut sugar, the almond milk, the 2 tbsp. of melted Miyoko’s butter, and salt. Stir to combine until a sticky dough forms. Rest this dough in the fridge for about half an hour. Once it has rested, you will roll it out into an 8 inch square. To do this, start by sprinkling flour on the countertop. Next put the dough in a ball on this floured surface and sprinkle the ball with flour. Pat the ball into a square-ish shape. Now roll it out, using a rolling pin (or wine bottle), and in between each roll-out use your hands to push the dough back into a square-ish shape. In this manner, the ball turns into a cube and then slowly into a thinner square. Stop when you have approximately 8 inches on each side. At this point, you can wrap the dough tightly with plastic wrap or beeswax wrap and put back into the fridge while you make the beurrage.

To make the beurrage you will pound your butter into a 6-inch square. To do this, get a piece of parchment paper and, using a pencil and ruler, draw a 6-inch square on the paper. Then, put the paper, pencil side down, on the counter (this way the pencil marks won’t touch the butter but you can see them through the paper). Cut the block of butter in half to make two slabs. Place these slabs on the parchment paper inside of the 6-inch square that you drew. You may need to cut the slabs into more than two pieces to fit them into the square, this is totally fine. Now, fold the parchment paper at the pencil marks so the extra paper (that is not the 6-inch square) creates an envelope around the butter. You will use this to help guide you in beating the butter into a 6-inch square shape. Next, use the rolling pin (or wine bottle) to gently hit the butter until it fills up the empty space thus creating a 6-inch square. Once the butter has spread to the edges of the envelope (aka is at a 6-inch square shape, but probably bumpy) keep the parchment paper envelope and now gently roll the butter slab to even it out into a 6-inch square of consistent thickness. Refrigerate your beurrage aka slab of butter for about half an hour.

Next we will describe how to put the dough and butter together and roll it out. We found it helpful to watch How to Make Proper Croissants Completely by Hand. We will describe the process below as well, and give you time markers for applicable parts of the video. Starting at 5 minutes and 57 seconds and ending at 8 minutes and 57 seconds will walk you through the next two paragraphs. Note: in this video there is a lot of attention to detail on having the perfect square however the croissants don’t actually need perfection to be delicious and delightful.

Flour the counter. Take your dough out of the fridge, and place it on the counter like a diamond, with a corner toward you. Carefully roll the corners out to stretch them just a bit, and then roll gently to flatten the whole diamond. Unwrap your slab of butter and place it so that the corners of the butter are in the middle of each side of the dough. Fold the corners over the butter so that all four corners meet in an x-shape over the butter. Pinch to seal the edges. Now wait for about 2 minutes so that the butter softens enough that when you roll it out it won’t break apart.

Now you will roll and do your first turn. First, add a bit of flour to the dough and butter packet to keep the rolling pin from sticking to the dough. Next, gently tap and rock your rolling pin (or wine bottle) over the surface of the dough and butter slab packet, first in one direction and then in the other. Then, using long, single direction strokes, roll the dough and butter slab packet out until you have an 18-inch long rectangle. Fold the end closer to you up the rectangle about 3/4 of the way. Fold the end that is further from you to meet the first end. Then fold the nearer end to the further end. Gently tap the dough to bind the layers. Rest in the fridge for one hour. After an hour, remove the dough from fridge and repeat this entire process, but in the opposite direction. When you get to the part where you fold the dough, this time you will only fold the dough in thirds. Wrap the dough again, put it in the fridge, and refrigerate overnight.

Roll the dough into a rectangle 8-inches by 25-inches. Cut into triangles 8-inches in height and 4-inches along the shortest side. Roll the triangle not too tightly (because it needs room to rise). Optionally, you can at this point and curve them slightly into the traditional croissant shape. Place on a sheet pan lined with a Silpat. This section can be seen in the video starting at 10 minutes and 58 seconds. Note that he is making his croissants larger than ours, so use our measurements above but you can check the video for some technique tricks. This section of the video ends at 13 minutes and 11 seconds.

Let the croissants rise on the counter until they are slightly bigger, fluffier, and softer. They have a bit of a ‘jiggle’ to them at this point. If you don’t let them rise all the way some of the butter will melt out onto your baking sheet as they bake (the croissants will still be delicious). This process takes about an hour. Preheat the oven to 425 F about 40 minutes into the rise. If your kitchen is cold, allow longer for the rising and start the heating of the oven a bit later.

If you are using powdered coconut milk, mix about 1 tbsp of powder with 2 tbsp water. Once the croissants have risen very carefully brush their tops with coconut wash, being careful not to push any air out of the newly risen croissants in the process. Once the oven is fully heated, bake the croissants on the center rack for 15 minutes. Make sure to turn the cookie sheet halfway through the baking process. Be careful, it is easy to leave them in a few more minutes to brown and they can easily burn on the bottom. Let cool before enjoying!

Hummus

If you have a food processor (or blender) this is both easy to make and usually much less expensive then buying it at a grocery store. Plus, you can add your own flavors/toppings to mix up the experience. Check out our suggestions for this below and we’d love to hear in the comments your favorite additions to a basic hummus recipe.

Serves: 4

Time: 10 minutes

Ingredients

3/4 cup dried chickpeas* or 1 can chickpeas

3 cloves garlic

1.5 tbsp lemon juice

2 tbsp olive oil

Water

2 tbsp tahini

1/2 tsp cumin

1/2 tsp Hot sauce or to taste

Pinch salt


If you are using dried beans, cook them*. Once you have cooked the beans, drain and rinse them. Add all the ingredients to a food processor (or blender) and process until smooth.

You can add all sorts of delicious things to this hummus, or keep it plain and top with something yummy. Some examples of things you can add to the hummus or top it with are pine nuts, fresh herbs, roasted red pepper, roasted garlic, harissa, or olives! Serve with bread, crackers, or fresh vegetables or use on a sandwich. Enjoy!


*Cook the chickpeas using an Instant Pot or on the stove. (If you are using canned chickpeas skip to step 2)

In the Instant Pot: Add 3/4 cup of dried chickpeas to the pot. Cover the beans with water (in the small Instant Pot this is about 6 cups of water), season with 1 tbsp kosher salt, 1 tbsp cumin, 1 tbsp garlic powder, and 1/4 tsp cayenne. Set the Instant Pot to pressure cook for 35 minutes letting depressurize naturally.

On the stove: If you don’t have an Instant Pot, you can easily cook chickpeas from scratch with a little planning. First you will need to soak the chickpeas which can be done one of two ways. 1. you can soak them overnight making sure they have enough water and space to double in size or 2. you can put them in a pot and bring to boil, then turn off the water and let soak for one hour. Again, make sure you have enough water and space that they can double in size. Once you have soaked your beans, rinse them and then put in a pot with salty water. These will be cooking for about 2 hours so you don’t want as much salt as you would use for pasta, but you do want to add enough that you can taste the salt in the water. The best way to get good at this is to practice. Each time you salt the water, taste it and when the beans are done taste them to see if they are well salted. A well salted bean should taste flavorful but not salty. If it tastes like you are eating salt, you added too much. If the bean lacks flavor then you didn’t have enough salt. For this recipe, also add 1 tbsp cumin, 1 tbsp garlic powder, and 1/4 tsp cayenne to the chickpeas as they cook. Cook the chickpeas until they are soft but not falling apart (this will take 1.5-2 hours). We recommend checking the beans at about an hour and then every 20 minutes until they are soft but not disintegrating. Make sure your pot has enough water as I have definitely cooked all the water off before and burnt the beans!

Vegan Ranch Spinach & Sausage Pizza

Meaty, cheesy, crispy deliciousness!

Serves: 4

Time: 1 hour

Ingredients

1 box Simple Mills Gluten Free Pizza Dough, option to sub in your favorite dough

apple cider vinegar (for the dough)

olive oil (for the dough)

1 package Beyond Meat Breakfast Sausage links

1 onion

1 clove garlic

.5 lb shitake mushroom

1 handful spinach

1 batch cashew cheese

ranch powder

Salt

Pepper

2 Tbsp high heat oil


Cook the Simple Mills pizza mix according to the instructions on the box. If you have a pizza stone, preheat it with the oven. The first bake on this pizza dough will be done on a cookie sheet. You can also do the second bake on a cookie sheet, but we like how crispy the crust is when the second bake is on a hot pizza stone.

While the dough is baking, slice the shitake mushrooms, onion, and mince the garlic. Heat a pan and fry the sausage links until crispy on all sides (the sausage will release oil as it cooks, so no need for oil in the pan). Once fried, slice the sausages into small chunks.

Fry the onions and mushrooms until the onions are browned and soft and the mushrooms are browned and slightly crispy. Add salt and pepper to taste. This works better if you cook the mushrooms and onions separately, however sometimes do this in one pan if I’m not too worried about getting the perfect texture. Once these are almost fully cooked add the minced garlic into one of the pans (or the one pan if you are doing them together) and stir for about 1-2 more minutes while the garlic browns. Finally, throw the spinach in and stir slightly just to wilt a bit.

Next, make the cashew cheese if you haven’t already.

Now, if you have a pizza stone, transfer dough to the stone, flipping it over. If you don’t have a stone, I like to flip the dough over on the cookie sheet before adding toppings. To top, first spread the cheese in an even layer over the whole pizza. Then, do a heavy dusting of ranch powder over the entire cheese pizza. Next, add the spinach, garlic, onion, and mushrooms. Finally, top with the sausage chunks. Put the whole pizza back in the oven for just 5-10 minutes to get everything warm and melded, but not so much that anything burns (everything is already fully cooked).

Slice and enjoy!

Vegan Coconut Custard Pie

Coconut custard pie is one of Camille’s absolute favorites. They love eating it in the morning with a cup of natural coffee or some (oat)milky black tea. This recipe is inspired by the Minimalist Baker (one of Camille’s favorite food blogs). If you want to make their version of the pie you can find it here: minimalist baker’s coconut cream pie.

Makes: 1 pie

Time: 30 minutes active time, 3 hours (or overnight) resting time

Ingredients

For the crust:

1 cup gluten-free rolled oats (optionally sub gluten-free oat flour)

1 cup almond flour

1/4 tsp sea salt

2 tbsp coconut sugar

5 tbsp vegan butter, soy-free option

For the filling:

6 tbsp cornstarch

1/3 cup coconut sugar

1 pinch sea salt

2 cans full fat coconut milk

1 tsp vanilla extract

1/2 cup shredded coconut, plus more for garnish


Pre-heat oven to 350 F and grease a standard size pie dish. If you don’t own one of these, you can use any 8X8 pan, or if you use multiple smaller pans adjust cooking time for crust.

Pulse oats in a high speed blender or food processor until it is the texture of fine flour. If you are using oat flour, you can skip this step. Mix this oat flour with the almond flour, sea salt, and coconut sugar in a bowl. Cut the 5 tbsp of butter into the dry mixture until it the butter is pea sized and you have dough that holds up when you squeeze it between your fingers. The dough may look crumbly. If it crumbles apart completely when you squeeze it, you can work in a bit more butter. Using your hands, press this dough into the pre-greased pie dish until it is an even thickness on all sides. If you find it’s very thick or it seems like you have extra, you can pull this toward the top edge to create thicker edge around the rim. Bake the crust for 15-25 minutes until it is starting to brown and smells cooked. Note, sometimes the crust doesn’t look very much browner to me even when it is fully cooked. Remove and set aside to cool.

When the pie crust is done cooking, or is only 10 minutes away from being done, add the cornstarch, canned coconut milk, coconut sugar, and sea salt to a sauce pan and stir to as smooth a texture as possible (you may not be able to break up all the lumps before you heat it). Add this to medium heat and continue stirring focusing on removing all lumps. Once this starts to boil, cook for about 6 more minutes stirring constantly. The mixture should be bubbling and getting thicker. Use a rubber spatula to keep scraping the bottom and sides to keep the custard from burning. Once the mixture is thicker and looks jiggly, remove from heat and stir in 1/2 cup of shredded coconut and the vanilla extract. Stir this, and then pour it into the pre-cooked pie crust. Garnish with coconut shreds.

Let the pie cool on the countertop until it is room temperature, and then place it in the fridge at least 2-3 hours, ideally overnight, to set up. Note: if you your pie dish is made of glass, be especially careful not to put it in the fridge while still hot. Hot ceramic or glass cookware will break if you move it from cold to hot or hot to cold too quickly. Slice and enjoy!

Spinach and Sausage Bowl

We’re happy to be celebrating a new year with a hearty bowl of greens and vegan sausage!

Serves: 4

Time: 30 minutes

Ingredients

1 1/2 cups white rice

vegetable bouillon (optional, gluten-free option, soy-free option))

2 tbsp high heat oil (like avocado)

1 package Beyond Meat Italian Sausage

1 onion

1 bell pepper

1 handful shitake mushrooms

2 large handfuls of spinach

3 tbsp white wine or rice vinegar

Salt

Pepper


Cook the rice according to package. We like to cook rice in vegetable stock or with vegetable bouillon and a pinch of salt for more flavor.

Slice the onion while heating a pan to medium high heat with the oil. Add the onion to the pan, stirring occasionally until softened. While the onions are cooking, slice the bell peppers and mushrooms and add them to the pan as well. Slice the sausages and add them to the pan as well. Season to taste with salt and pepper. Cook on med-high heat until the veggies are fully cooked and the sausages are browned. As things start to stick, add the white wine or rice vinegar. When everything is fully cooked, add the spinach and stir. Allow to cook until the spinach is wilted and bright green.

Serve over rice and enjoy!

Veggie Bean 'N Noodle Soup

The rains are starting here in the Pacific Northwest and we are enjoying cozying up with this warm, quick, veggie soup.

processed_20210914_132049.jpg
processed_20210914_132103.jpg

Serves: 4-6

Time: 30 minutes

Ingredients

1 tbsp tomato paste

3 cups seasoned white beans* (2 cans)

1 medium onion

3 carrots

4 cloves garlic

1 medium zucchini

dried oregano

dried thyme

pinch hot pepper flakes

14.5 oz diced tomatoes

4 cups vegetable broth, gluten-free option and soy-free option

14.5 oz water

1/2 lb pasta shells, gluten free option

4 large broccoli leaves (replace with chard if broccoli leaves are unavailable)

1/2 cup bean water


If you are cooking beans from dry, put them in Instant pot to cook (or cook these from scratch before you start your soup).

Heat a large pot of salty water (for cooking pasta). When this water comes to a boil, cook the pasta el dente (usually about 2 minutes less than the recommended cook time). Drain and rinse with cold water until fully cooled down to prevent clumping.

Heat oil in a large soup pot. Cut the onions and carrots and cook over medium high heat until onions are soft, about 10 minutes, stirring frequently. While these are cooking, cut the garlic and zucchini. Add the garlic and zucchini to the pot and cook for an additional 4 minutes. Add the oregano, thyme, hot pepper flakes, and tomato paste. Stir to coat, cooking for about 1 minute. Add the diced tomatoes, vegetable broth and the water. Bring to a boil and then reduce to a simmer.

Cut the greens into ribbons. Add the cooked pasta, beans, and greens to soup and simmer for a final 5 minutes. Add salt to taste. If you like, instead of using salt you can use bean water (if you cooked the beans from scratch) or vegetable bouillon paste. Serve and Enjoy!

*Cooking white beans from dry:

In the Instant Pot:

To cook the white beans in an Instant Pot, add 1 1/3 cups of dried white beans to the pot.  Cover the beans with water (in the small Instant Pot this is about 6 cups of water), season with 1 1/2 tbsp kosher salt, 2 cloves garlic, 1 tbsp cumin, a sprig of rosemary, and 1/8 tsp cayenne.  Set the Instant Pot to pressure cook for 28 minutes letting depressurize naturally. Drain and rinse, reserving 1/2 cup of the liquid, before adding to the dish.

On the stove:

If you don’t have an Instant Pot, you can easily cook white beans from scratch with a little planning. First you will need to soak the beans which can be done one of two ways. 1. you can soak them overnight making sure they have enough water and space to double in size or 2. you can put them in a pot and bring to boil, then turn off the water and let soak for one hour. Again, make sure you have enough water and space that they can double in size.

Once you have soaked your beans, rinse them and then put in a pot with salty water. These will be cooking for about 2 hours so you don’t want as much salt as you would use for pasta, but you do want to add enough that you can taste the salt. The best way to get good at this is to practice. Each time you salt the water, taste it and when the beans are done taste them to see if they are well salted. A well salted bean should taste flavorful but not salty. If it tastes like you are eating salt, you added too much. If the bean lacks flavor then you didn’t have enough salt.

For this recipe, also add 1 1/2 tbsp kosher salt, 2 cloves garlic, 1 tbsp cumin, a sprig of rosemary, and 1/8 tsp cayenne to the white beans as they cook. Cook the beans until they are soft but not falling apart (this will take 1.5-2 hours).  We recommend checking the beans at about an hour and then every 20 minutes until they are soft but not disintegrating. Drain and rinse, reserving 1/2 cup of the liquid, before adding to the dish.

Make sure your pot has enough water as I have definitely cooked all the water off before and burnt the beans! This may seem like a lot of work, however once you get the hang of it the work is almost all passive and the reward is high: beans cooked from scratch taste much better and are much cheaper! 

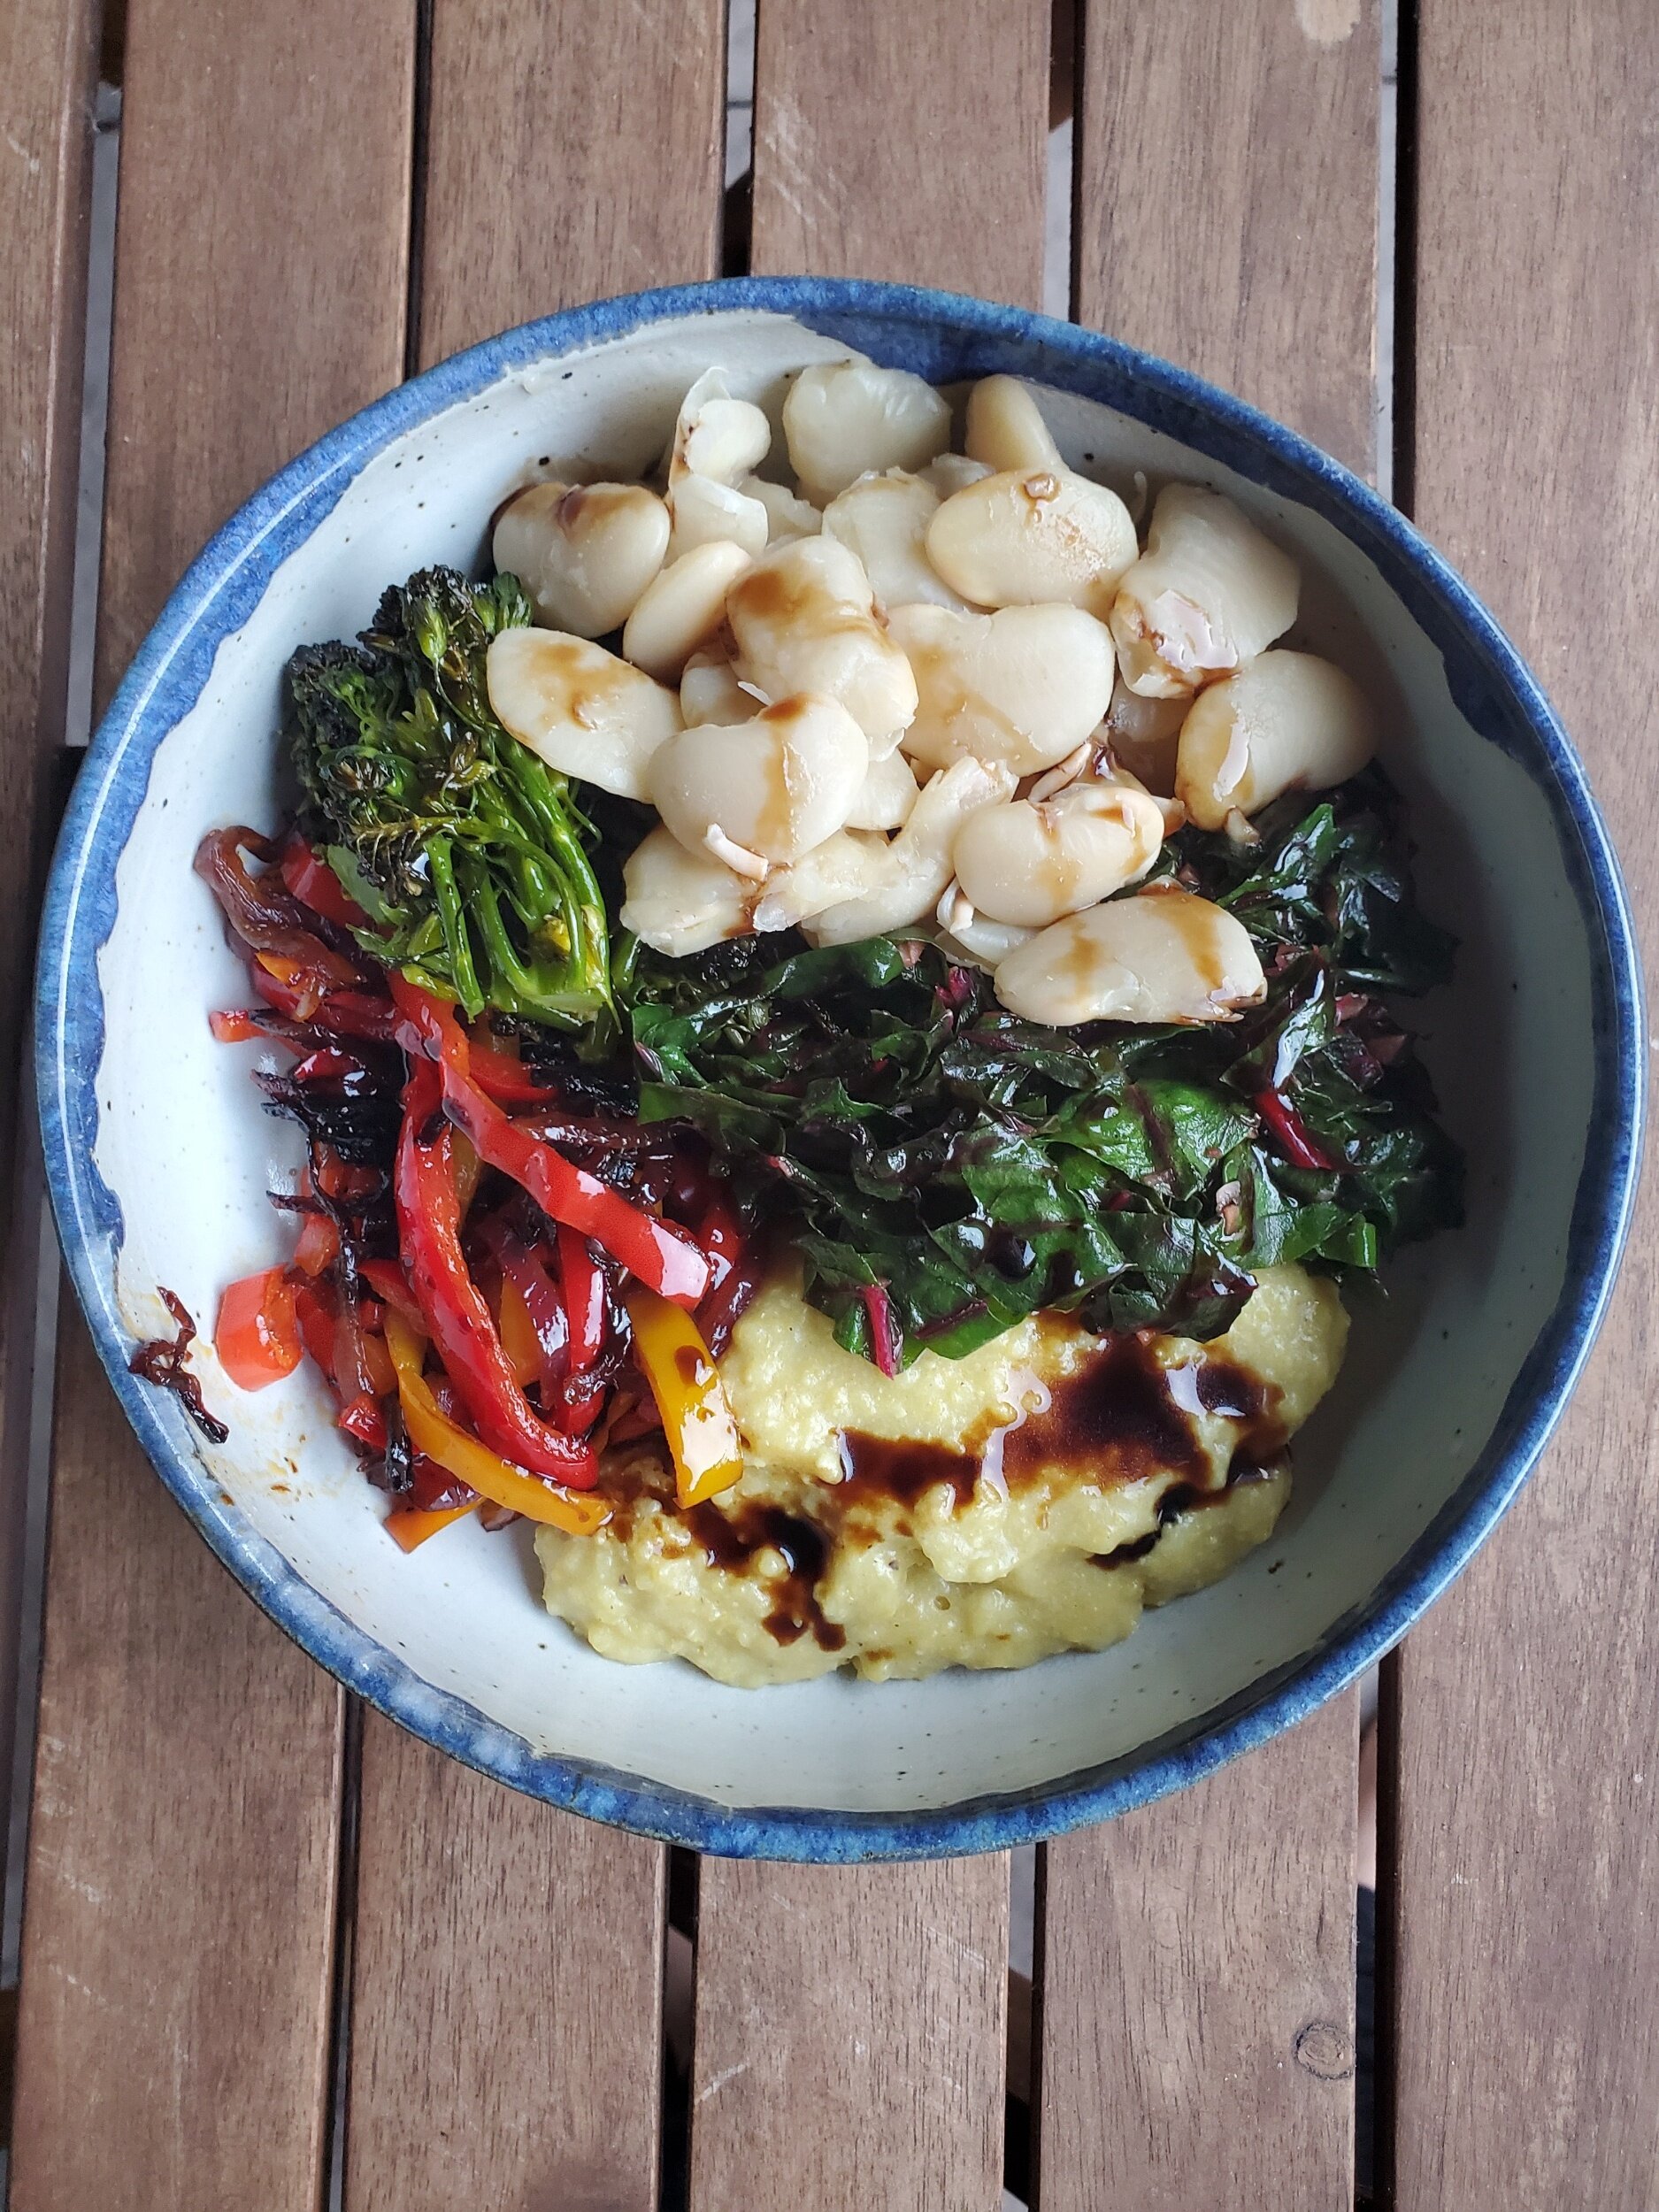
Late Summer Polenta Harvest Bowl

We love to top polenta bowls with aged balsamic vinegar. If you can afford it, balsamic that has been aged has a much lower acidity than non-aged, and the result is a syrupy and sweeter vinegar. Sometimes we’ve lived in places that have specialty stores that focus on olive oil and balsamic vinegar. Having been exposed to multiple producers has given us a real appreciation for tasty balsamic. One of our absolute favorite balsamic vinegars is apple balsamic from Rockridge Orchards and Cidery which is unfortunately only available at their farm stand in Enumclaw, Washington or at some Seattle farmers markets. The reason we include vinegar in this dish is the acidity can lift other flavors. When we don’t have access to aged balsamic, we use lemon juice, and it is delicious as well. If you have extra funds and like vinegar, we encourage experimenting with the many different types of balsamic!

processed_20201006_181859.jpg
processed_20201006_181913.jpg

Serves: 4-6

Time: 1hr with Instant Pot (or pre-cooked beans)

Ingredients

1 serving polenta

aged balsamic vinegar

For the broccolini

1 bunch broccolini

salt

oil

For the butter beans (lima beans)

1 1/3 cups (or 1 can) cooked butter beans*

For the Peppers and Onions:

1 red onion, thinly sliced

2 bell peppers, cored and sliced,

salt

oil

For the Chard:

1/2 bunch chard

3 cloves garlic

salt

oil


Make the polenta & cook the beans*.

Pre-heat the oven to 375 F. Cut the ends of the broccolini. Slice the peppers and onions. Mince the garlic for the chard and de-stem the chard and cut into small ribbons.

Toss the broccolini in olive oil, sprinkle with salt and put in the oven. Flip the broccolini after 15 minutes and cook a total of around 25 minutes at which point the broccolini should be bright green but with parts of it golden brown and crisp.

Heat a pan with 2 tbsp of oil. Add the onions and salt them. Cook for about 10 minutes (stirring regularly) or until they are starting to soften and add the peppers. Cook for an additional 10 minutes and set aside in a bowl.

Add 2 tbsp of oil to the hot pan. Add the garlic and cook until fragrant (about 1 minute since the pan is hot). Add the chard, toss with the garlic and sprinkle the whole thing with salt. Once the chard is wilted (about 2 minutes) you are ready to assemble the bowls.

To serve, layer polenta, brocolini, peppers & onions, and chard into a bowl. Drizzle the entire meal with some aged balsamic vinegar and enjoy!

processed_20201006_181903.jpg

*Cooking butter beans (lima beans) from dry:

In the Instant Pot:

To cook the butter beans in an Instant Pot, add 3/4 cup of dried butter beans to the pot.  Cover the beans with water (in the small Instant Pot this is about 6 cups of water), season with 1 tbsp kosher salt, 1 tbsp cumin, 4 garlic cloves, and 1/8 tsp cayenne.  Set the Instant Pot to pressure cook for 15 minutes letting depressurize naturally.  Drain and rinse before adding to the dish.

On the stove:

If you don’t have an Instant Pot, you can easily cook butter beans from scratch with a little planning. First you will need to soak the beans which can be done one of two ways. 1. you can soak them overnight making sure they have enough water and space to double in size or 2. you can put them in a pot and bring to boil, then turn off the water and let soak for one hour. Again, make sure you have enough water and space that they can double in size.

Once you have soaked your beans, rinse them and then put in a pot with salty water. These will be cooking for about 2 hours so you don’t want as much salt as you would use for pasta, but you do want to add enough that you can taste the salt. The best way to get good at this is to practice. Each time you salt the water, taste it and when the beans are done taste them to see if they are well salted. A well salted bean should taste flavorful but not salty. If it tastes like you are eating salt, you added too much. If the bean lacks flavor then you didn’t have enough salt.

For this recipe, also add 1 tbsp cumin, 4 garlic cloves, and 1/8 tsp cayenne to the butter beans as they cook. Cook the beans until they are soft but not falling apart (this will take 1.5-2 hours).  We recommend checking the beans at about an hour and then every 20 minutes until they are soft but not disintegrating. Make sure your pot has enough water as I have definitely cooked all the water off before and burnt the beans! This may seem like a lot of work, however once you get the hang of it the work is almost all passive and the reward is high: butter beans cooked from scratch taste much better and are much cheaper!

Roasted Potatoes with Curried Mayonaise

Potatoes, have we mentioned how much we love them? We can’t get enough of this super simple yet delightfully delicious dish!

Serves: 2-4 as a side

Time: 1 hr 15 minutes (15 minutes active)

Ingredients

6 medium sized potatoes (we like the waxy kind for this)

2 tbsp olive oil

salt

For the mayonnaise:

1 small shallot

2 tbsp olive oil

1/4 tsp kosher salt

2.5 tsp curry powder

1/3 cup of vegan mayonnaise, soy-free option


Pre-heat the oven to 375 F. Wash and cut the potatoes into 1-2 inch chunks (or in 8ths). Put on cookie sheet (optionally use a silpat or parchment paper). Drizzle with olive oil and sprinkle with salt. Roast for 45 minutes to one hour, stirring every 15 minutes, or until golden brown and slightly crispy.

While the potatoes are roasting, mince the shallot and heat up a pan to medium high heat with some olive oil. Add the onions and salt and cook, stirring constantly until caramelized. Add the curry powder and cook stirring for about 30 seconds until it is a fragrant paste. Combine all of these ingredients with the mayonaise in a small bowl, whisking to emulsify.

Dip the roasted potatoes in the curried mayonnaise and enjoy!

Backpacking Food

I (Camille) went on my first backpacking trip last week! It was amazing to spend four days by a lake, swimming, watching fish jump, and filtering my water from cold mountain streams. The best part of the trip: being full on delicious food the whole time! I’m going to list here some of my favorite (and least favorite) meals that I tried.

I also realized in the process that next time I fly on a plane or travel to a place that is less vegan/gf friendly I can bring this food with me and won’t have to worry about not having access to a kitchen or restaurant where I can eat. In airports or cities you can go to any coffee shop and get boiling water to re-hydrate these meals. Also, lots of these meals only need cold water so that’s even easier.

As I write this, I’m living through a heat wave in the Pacific Northwest and enjoying eating some of these backpack foods so that I don’t have to turn on the stove and add to the heat in the house.

For this post I’m going to focus on meal-like foods although I stocked up on granola bars and chips as well, however that will have to be another post!

Eating 1.JPG
Eating 2.JPG

Outdoor Herbivore: love this company! While I sometimes struggle to navigate their website, their food is both scrumptious and feels good inside my body. Lots of great veggie options that remind me of the food I eat at home and make me feel like I could spend weeks on the trail.

Pacific Northwest.JPG

Favorites

Sunrise Tofu Scramble - salty deliciousness. Note: I love salt and this is the perfect amount for me - if you aren’t a salt lover this might be too salty for you.

Hop Pea Slop - I’m so in love with this creamy crunchy veggie salad - this is probably my favorite thing by Outdoor Herbivore.

Open Sky Yasai - such good veggie yumminess. Would go GREAT in Ramen.

Naked Freckle Burrito - so good, medium spicy (perfect for me) and very beany. Ate with corn chips and that was delightful!

Instant Hummus - medium spicy very flavorful hummus.

Did not Love

Lemongrass Thai Curry — If you love spice you will love this, however for me it was too spicy to even finish.

Maya Kamal Everyday Chana and Everyday Dal: Pre-made food that needs to be re-heated (when we ran out of cooking fuel I ate them cold and that was delicious as well!)

Right Rice: *This brand uses some pretty heavy food moralizing claiming that rice made from beans and vegetables is more ‘right’ than rice. The centering of thin white beauty standards and attempting to label rice (a staple product eaten all over the world, and integral to many food cultures) as ‘wrong’ is deeply disturbing. It is also about twice as expensive as pre-made rice. Labeling this more expensive product as the correct or superior option is another way that, as a society, we label people with less money as morally inferior.* I choose to eat their product because de-hydrated rice-substitute made of beans and veggies feels good in my body. I want to share this as an option for folks who are looking for different tasty food options and am mindful that this product has very harmful packaging and ethos.

Tasty Bites: We really enjoy their brown rice and have yet to try their other products.

Miracle Noodle Pad Thai: *The amount of food moralizing on this package stresses my body out, so adding a trigger warning for diet culture.* I did enjoy the flavor and texture of this pre-made ‘pad thai’ it was a low to medium spice level and good both cold and hot. I needed two packages for 1 serving.

Granola Bars

These granola bars are chewy, slightly sweet, and texturally pleasing. Biting into a blend of nuts, fruit, and every now and again bonus chocolate chunks is such a joy! Feel free to adjust which dried fruit and nuts you use to maximize your pleasure.

Pans needed: Ideally a 13” x 9” brownie pan (so the sides are about 3 inches tall. You may also be able to do this in a pan with shorter sides however you would need to adjust the cook time.

Serves: 15-20 bars

Time: 1hr 40 minutes (30 minutes active)

Ingredients

2 cups old fashioned oats, gluten free option

1/3 cup coconut sugar

1/2 teaspoon kosher salt

1/2 teaspoon cinnamon

1/2 teaspoon vanilla powder (like this one)

3 cups dried fruits and nuts: my favorite mix is almonds, pecans, dried cranberries sweetened with apple juice, raisins, sunflower seeds, and chocolate chips (I love Hu Gems).

1/3 cup vegetable oil

1/3 cup maple syrup

1 tablespoon water

3 tablespoons almond butter


processed_20210529_173101.jpg

Preheat the oven to 350°F.  Put a piece of parchment paper in a 13" x 9" pan perpendicular to the pan so it hangs over the two long sides.  Grease this and the sides of the pan that remain uncovered with vegetable oil.  


Blend 1/3 cup of the oats in a food processor until it is a rough flour.  Stir together all the dry ingredients in a large bowl.  The blended oats will coat the fruits and keep them from sticking together in a lump.  Pour the oil and water over the mixture and toss gently.  Add the maple syrup and mix until the mixture is a consistent wetness. Warm the almond butter gently to make it easier to pour (this step is easiest done in a microwave and can be skipped if you don’t have one). Stir in the almond butter.  Turn the mixture into the oiled pan and press down to cover the whole bottom of the pan including the corners.  


Bake in the 350°F oven 40 minutes or until the edges are browned.  Remove the pan from the oven and allow to cool on a wire rack for five minutes. Carefully lift the parchment out of the pan and place it on back onto the cooling rack for at least 20 minutes more.  If the bars are cool enough you should be able to remove the parchment paper without the granola bending too much. Cut into bars. There will be crumbly parts and crumbs, but they are just as delicious as the bars. Enjoy!

processed_20210529_184844.jpg

Mustard Brussels Sprouts

We got this recipe from Anne’s sister Virginia who got it from her mother in-law. We’ve made some changes for how we like to eat it, and love that it reminds us of family. We find this recipe works best for smaller sized brussels sprouts.

processed_20210404_185114.jpg
processed_20210404_185150.jpg

Serves: 2-4 as a side

Time: 45 minutes

Ingredients

1 lb brussels sprouts

2 tbsp high heat oil, like avocado

2 tbsp olive oil

1 tbsp mustard seed

2 tbsp mustard (gluten-free option, soy-free option)

1/2 tsp salt

pinch hot pepper flakes


Cut a cross into the base or stem end of your brussels sprouts. Make sure not to cut these too deeply as you still want the stem to hold the sprouts together. The goal is to allow the stem to soften more in the cooking process without having it lose shape completely. Par boil them about 3 minutes in heavily salted water.

Next heat a pan to med-high with 2 tbsp high heat oil and fry the brussels sprouts until golden brown and slightly crispy. Take them out of the pan, put in a bowl and set aside.

In the same frying pan on medium heat, add 2 tbsp olive oil and the mustard seeds. Keep them moving. They will begin to make a popping noise and jump up on the pan. Add the mustard and stir to combine. Add the brussels sprouts and stir to coat. Add salt and hot pepper flakes. Saute until the sauce is thick, about 2 minutes.


Harissa Tofu with Polenta Crusted Potatoes and Fried Broccoli

This week we are combining two previous recipe to make a full plate meal. Enjoy this tofu and potatoes with broccoli on the side!

processed_20210211_120514.jpg

Serves: 2-4

Time: 1 1/2hrs

Ingredients

1 batch of polenta crusted potatoes

1 batch of harissa tofu

1 bunch of broccoli

olive oil

salt


Cook the polenta crusted potatoes and harissa tofu. Cut the broccoli into florets and cut up the stem into small pieces, removing the first inch which is very fibrous. Heat up a frying pan with olive oil and stir fry broccoli until soft (about 5 minutes). Add salt to taste. To serve assemble potatoes, tofu, and broccoli on a plate and enjoy!

processed_20210211_120410.jpg

Sesame Tofu Noodle Bowl

This is a meal we often make when we aren’t sure what else to make because it is easy to keep the needed ingredients on hand. While the recipe calls for swiss chard, we often use whatever is in our fridge. For us this is often red cabbage (since it lasts a long time in the fridge). We also love this meal with broccolini.

processed_20210215_094817.jpg
processed_20210215_094657.jpg

Serves: 4-6

Time: 1 hr 30 minutes

Ingredients

1 batch sesame tofu

1 lb pad thai rice noodles

1 bunch of swiss chard

4 cloves of garlic

1 tbsp tamari

1 tbsp sesame oil


Prepare the sesame tofu.

While the tofu is cooking, boil the pad thai noodles according to instructions on the package. Important: when the rice noodles are cooked rinse them with cold water so they don’t continue to cook into a large blob of noodle. Stir the sesame oil and tamari into the cooked noodles.

Then, wash the swiss chard and strip the leaves from the stem. Cut the chard into ribbons. Mince the garlic. Heat a pan with some olive oil. Cook the garlic until fragrant, add chard. Sautee until wilted. Toss the noodles with the chard and tofu and eat. Enjoy!