Potatoes Au Gratin

We love potatoes. We love to eat them every way possible and we love this recipe which makes a whole casserole full of delicious creamy potatoes. We tried cooking these with the peel on and it works but texturally we enjoy it more without the skins. We think these go great with lemon butter broiled asparagus and black bean burgers.

processed_20190713_200318.jpg
processed_20190713_200321.jpg

Serves: 6-8

Time: 2 hours (1 hour active)

Ingredients

8 waxy potatoes (2 lbs 10 oz)

1 cup cashews

1/2 cup plus 1 tablespoon olive oil

1-2 tsp minced rosemary

1 tsp mustard

1/2 tsp garlic powder

pinch cayenne

2.5 tsp salt


Soak cashews in enough water to cover them for 30 minutes or more. While the cashews are soaking, peel and cut the potatoes into thin slices. This is best done with a mandolin (1/8 in thick) but can be done with a knife.

Preheat oven to 350 F.

Strain the cashews and put them in a blender pitcher. Cover with water and blend until smooth. This is best done with a Vitamix as less high powered blenders will make grainy cashew cream. Transfer the cream to a liquid measuring cup and add rosemary, mustard, garlic powder, salt, and cayenne.

In a baking dish or casserole, layer potatoes and alternate drizzling olive oil and cream mixture. The final layer of potatoes should have both cream and oil.

Bake in the preheated oven one hour and broil for 5 additional minutes to make the top crispier. Enjoy!

Black Bean Chili

Delicious warm chili for these cold nights. Happy solstice y’all!

We love eating this chili with garlic bread.

processed_20200629_193604.jpg

Serves: 4-6

Time: 1 hour 30 minutes (35 minutes active)

Ingredients

1 medium onion, chopped

5 cloves of garlic, minced

salt and pepper

1+ 1/4 tsp chili powder

1 tsp salt

1/2 tsp taco mix

1/2 tsp garlic powder

2 medium zucchini, chopped

2 medium tomatoes, chopped

1 cup of corn, optional

2 cups drained and rinsed black beans*

3 cups vegetable broth (gluten-free option, soy-free option)

2 tbsp tomato paste

1/2 cup brown or wild rice

1-3 cups of water

1/2 tsp apple cider vinegar


In a big soup pot over medium heat saute the onion and garlic in a little olive oil until the onions are soft and fragrant about 7 minutes.  Add the chili powder, taco mix, garlic powder, salt, pepper, tomato paste, and zucchini.  Stir well and continue to cook about 5 minutes.  Add the tomatoes and corn (optional) and cook another 3 minutes until the tomatoes start to release their juice. 

Add the rice and the broth. Reduce heat to an active simmer and cook about 40 minutes until the rice is almost tender.  Add 1 cup of water, beans, and apple cider vinegar and cook another 15 minutes, stirring regularly.  If it starts to stick on the bottom, add more water. Enjoy!

processed_20200629_193556.jpg

*Cooking black beans from dry:

In the Instant Pot:

To cook the black beans in an Instant Pot, add 1 cup of dried black beans to the pot.  Cover the beans with water (in the small Instant Pot this is about 6 cups of water), season with 1 tbsp kosher salt, 2 tsp cumin, 1 tsp garlic powder, and 1/4 tsp cayenne.  Set the Instant Pot to pressure cook for 19 minutes letting depressurize naturally.  Drain and rinse before adding to the dish.

On the stove:

If you don’t have an Instant Pot, you can easily cook black beans from scratch with a little planning. First you will need to soak the beans which can be done one of two ways. 1. you can soak them overnight making sure they have enough water and space to double in size or 2. you can put them in a pot and bring to boil, then turn off the water and let soak for one hour. Again, make sure you have enough water and space that they can double in size.

Once you have soaked your beans, rinse them and then put in a pot with salty water. These will be cooking for about 2 hours so you don’t want as much salt as you would use for pasta, but you do want to add enough that you can taste the salt. The best way to get good at this is to practice. Each time you salt the water, taste it and when the beans are done taste them to see if they are well salted. A well salted bean should taste flavorful but not salty. If it tastes like you are eating salt, you added too much. If the bean lacks flavor then you didn’t have enough salt.

For this recipe, also add 2 tsp cumin, 1 tsp garlic powder, and 1/4 tsp cayenne to the black beans as they cook. Cook the beans until they are soft but not falling apart (this will take 1.5-2 hours).  We recommend checking the beans at about an hour and then every 20 minutes until they are soft but not disintegrating. Make sure your pot has enough water as I have definitely cooked all the water off before and burnt the beans! This may seem like a lot of work, however once you get the hang of it the work is almost all passive and the reward is high: black beans cooked from scratch taste much better and are much cheaper!

Swiss chard, mushroom, & tofu bowl with toasted cashews

This dish was inspired by the food that Camille had in her fridge. At the time, she had 4 mushrooms, so that is what she used. If you have more, it’s really good with about 2 cups of sliced mushrooms and I’m sure it would be good with anywhere in between. We’ve enjoyed it with both cremini and oyster mushrooms and would bet it would also taste good with shiitake mushrooms and chestnut mushrooms.

Also, we realize that yesterday was Indigenous People’s Day. If you’re interested in why we feel so called ‘Columbus Day’ should be changed federally to Indigenous People’s Day check out this beautiful episode from the All My Relations Podcast.

processed_20200705_200304.jpg

Serves: 4

Time: 30 minutes

Ingredients

For the greens:

1 bunch Swiss chard, de-stemmed and thinly sliced

some mushrooms (see intro)

salt

1/4 tsp pepper

2 tbsp olive oil

2 tbsp coconut aminos

1 tsp pomegranate molasses (optional)

For the tofu:

1 block tofu

1/4 cup sesame oil

1 tsp salt

1/4 cup nutritional yeast

For the rice:

1 cup sushi rice

2 cups slightly salted water

1 tsp rice or champagne vinegar

1/2 tsp sugar

For the garnish:

1/4 cup cashews, toasted

1/2 bunch thinly sliced green onion


Slice the mushrooms and sautee until golden brown with salt and pepper. Taste to make sure these are seasoned to your preference. While they are cooking, de-stem the chard and slice into small ribbons. When the mushrooms are fully cooked, add the swiss chard, pomegranate molasses, a bit of salt, and coconut aminos. Cook 1 minute until the chard is shiny and soft but not yet browning.

Cook the sushi rice in salted water until done. You want to add some salt, but since you won’t be draining the rice it shouldn’t be as salty as sea water. We used about 1/2 tsp salt, but this will depend on the type of salt you are using. Once it is cooked, add all the other ingredients to the rice and fluff with a fork.

Slice the tofu into 1 inch squares. Heat the sesame oil in a pan, once hot add the tofu. Cook undisturbed on one side until golden brown. Salt and flip. Cook until crispy on the second side and then pour all the nutritional yeast in the pan and stir to coat.

Toast the cashews if they are raw and slice the green onions.

To serve, assemble rice on the bottom, then tofu, then greens. Top with toasted cashews and green onion and enjoy!

processed_20200705_200307.jpg

Ranch Powder for Popcorn

Anne’s good friend, Kristin, requested a recipe for a vegan version of ranch seasoning for popcorn. Although we weren’t raised with ranch, we love the inspiration and are totally into eating this all the time. This topping could be used as a garnish on many things, like french fries for example! We haven’t gotten that far yet since we love popcorn so much. We would love to hear from you in the comments your favorite things to garnish with this delicious powder!

processed_20200630_162746.jpg
processed_20200629_173524.jpg

Serves: 2.75oz (80g) ranch powder mix which is enough for about 3 large servings of popcorn

Time: 15 minutes

Ingredients

1/2 cup powdered coconut milk

1/2 tsp citric acid

3 tbsp nutritional yeast

2 tbsp dried parsley

1 tbsp dried chives

2 tsp garlic powder

2 tsp onion powder

1 tsp kosher salt

1/4 tsp black pepper

pinch cayenne


Put the coconut milk in a bowl and fluff to break up any clumps. The more smooth you get it before adding the other ingredients, the more it will combine the flavors. Add the rest of the ingredients and mix until well distributed. I usually pop about 3 oz of popcorn and top with 4 tbsp of olive oil and 4 tbsp of the topping.

This topping can be kept in a jar in your pantry until you have eaten it all.

Chickpea Crepe with Tofu Scramble and harissa veggies

Do Better Consulting re-posted a tweet from MerQueenJude’s instagram… and we love it. Here’s the tweet:

2020-07-12 (2).png

It’s okay to be fat. Fat is simply a size and people come in different sizes. People often ask us what we blog about, and for us it’s simple: we share recipes of the food that we like to eat. This blog is about our creativity and joy in the kitchen. Because we often share recipes full of vegetables and because we use ingredients that are often expensive, people label our food as ‘healthy’ or morally superior. These ideas are a manifestation of diet culture which ties superiority and ‘health‘ to thinness. If you haven’t seen the Poodle Science video we highly recommend watching it.

Now that we’re clear that our food is not ‘better’, ‘the right thing to eat’, or somehow going to make you the perfect tool of capitalism or object of beauty, let us share with you a delicious chickpea crepe recipe!

Note that you can cook all the crepes at once, but when we aren’t planning to eat them all at once we will often only cook a couple of crepes for that night and then cook off more crepes during the week so that we can eat this for multiple meals. If you decide to do that, it will shorten the cooking time on the recipe below by at least 30 minutes.

processed_20200531_130735.jpg

Serves: 6-8

Time: 2 hrs

For the Chickpea Crepe

3 cups chickpea flour

2 1/2 tsp sea salt

3 1/2 cups water

3/8 cup or 6 tbsp olive oil

2 tsp turmeric

2 tsp coriander

2 tsp cumin

For the Carrot Top Pesto

small handful of carrot tops

2 cloves garlic

1/4 cup almonds or nut milk pulp from making milk

1/4 cup olive oil

1 1/2 tsp apple cider vinegar

1 tsp salt

For the Tofu Scramble

carrot top pesto

1 block tofu

1 tbsp corn starch

2 tbsp cooking oil

1/2 tsp turmeric

1/2 tsp garlic powder

1 tsp bouillon

1/4 cup of hot water

For the Roasted Harissa Carrots

4 medium carrots

olive oil

1/2 tsp salt

3 tbsp spicy harissa

1 tbsp agave

1 tbsp lemon juice

For the Roasted Cumin Cauliflower

2 small heads of cauliflower, romanesco, or a combination

2 tbsp olive oil

1 tsp salt

1 tsp cumin

1/4 tsp cayenne


Preheat the oven to 375 F. Mix the chickpea flour, salt, water, olive oil, and spices. Whisk until smooth and let sit for 30 minutes.

Cut the cauliflower into florets and the carrots into sticks. Toss the cauliflower with the olive oil and spices. Spread on a baking sheet and put in the preheated oven. Cook these until they are golden brown in places and soft when you stick a fork in them, which takes about 40 minutes. Stir every 15 minutes. Toss the carrots with olive oil and salt, and spread on a separate baking sheet. Roast in the preheated oven about one hour, stirring every 15 minutes. Stir together the remaining ingredients for the harissa carrots and set aside. Stir this mixture into the carrots when there are 15 minutes remaining. It will reduce and stick to the carrots.

To prepare the pesto, add the carrot tops, garlic, almonds or pulp, olive oil, vinegar, and salt to a food processor or blender. Blend, stopping to scrape down the sides regularly, until the ingredients combine in a chunky pesto. In a blender you may require some additional water to allow this to easily blend.

In a large frying pan, heat a small amount of oil. Once the oil is hot, add about 1/3 cup of chickpea batter to the hot pan. Tilt the pan to spread out the batter, and cook until golden brown and crispy on one side. Be patient, when the bottom is golden brown and crispy, the edges of the top will start to show color. Flip the crepe over and cook until speckled with golden brown on the second side. Cooking crepes to have a crisp but flexible texture takes some practice. Some tips are make sure your oil is hot before you add the batter. Don’t add too much batter. Allow the first side to cook until an even color is achieved before flipping. Remember, the first pancake rule applies to crepes as well. Your first crepe might come out under cooked and crumbly. Don’t be discouraged, keep cooking, be patient, and future crepes will be better.

We often cook as many crepes as we want to eat when we first make this dish. We then refrigerate the batter and fry fresh crepes for leftovers. When cooking batter that has been refrigerated, make sure to stir thoroughly before frying and, if it is too thick, you can add a little water to thin it out.

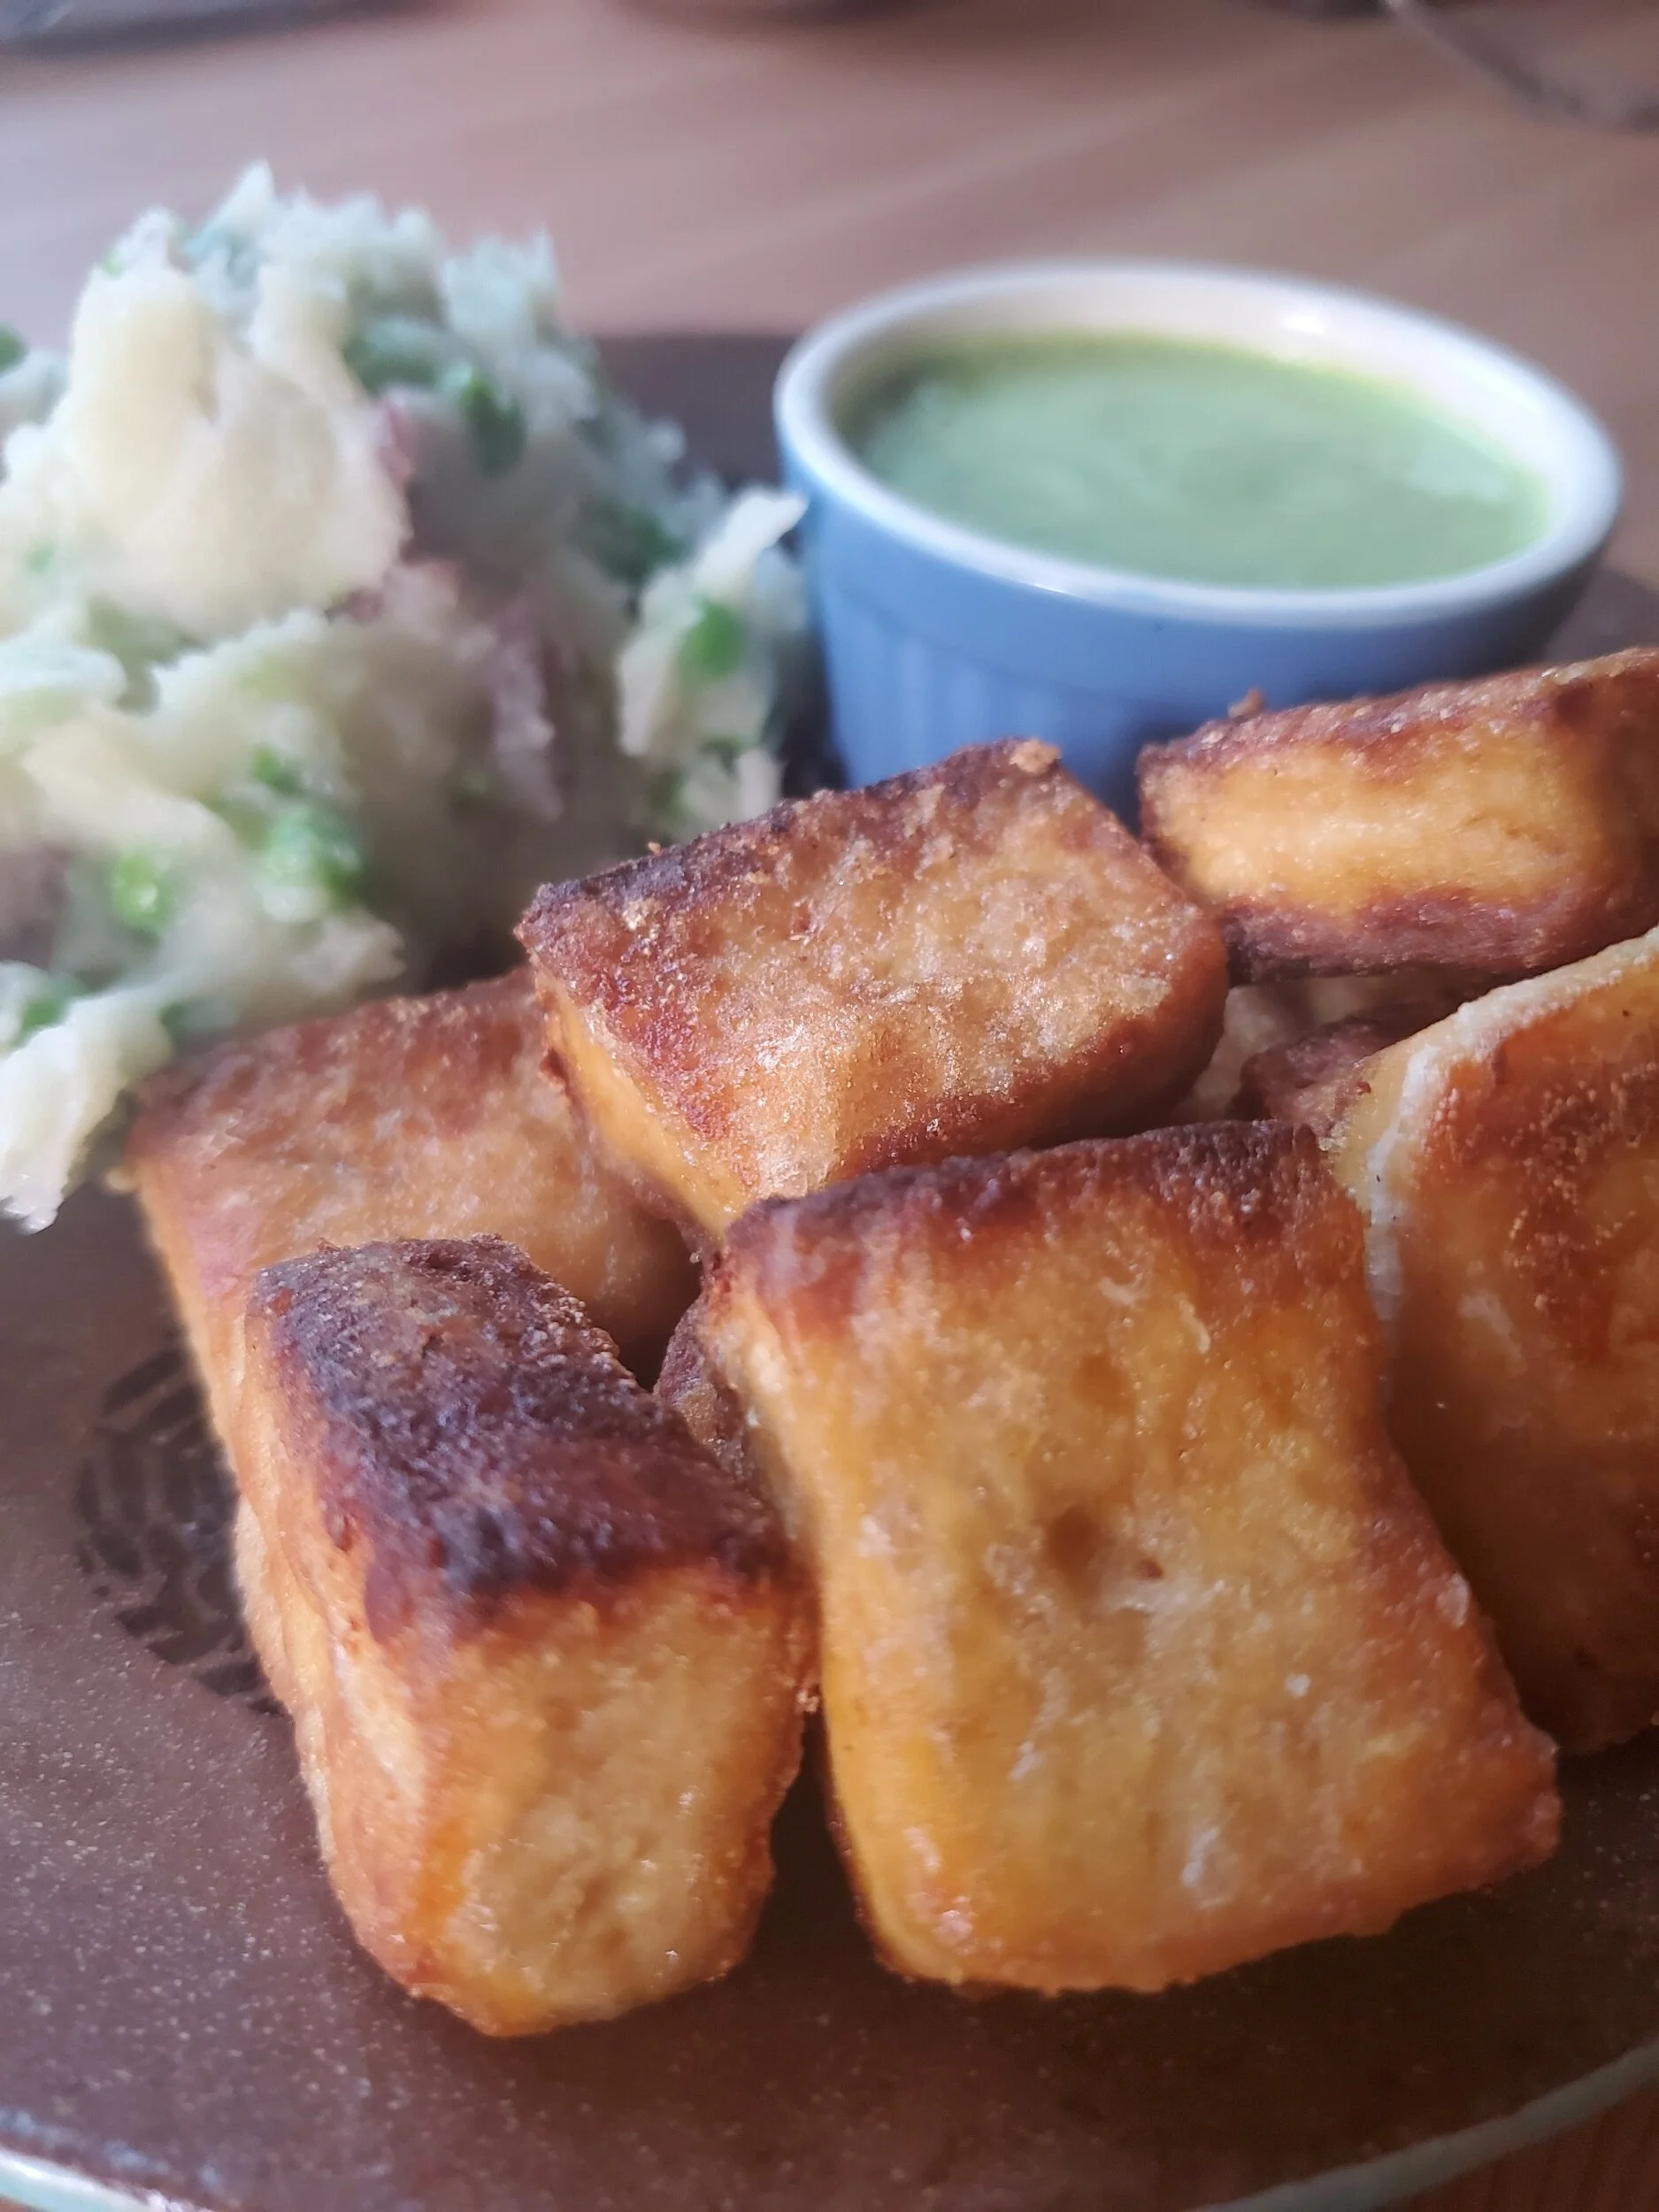
If you have two frying pans, you can make the tofu scramble at the same time as the chickpea crepes. Add oil to the frying pan and heat to medium low. Drain the tofu and crumble it into the hot pan. Add the corn starch and stir to coat. Fry, turning every 5 minutes, until parts are starting to brown, about 10 minutes. Add the turmeric, garlic powder, and salt. Cook about 5 more minutes stirring regularly until the tofu is coated. While it is cooking, dissolve the bouillon in hot water. Add the bouillon liquid to the tofu, and cook until there is no longer any liquid, but before the tofu gets dry again. Stir the pesto into the tofu scramble.

To serve, top chickpea crepes with the tofu mixture, roasted cauliflower, and harissa carrots. Enjoy!

Sweet N Salty Pitaya Bowl

This week our hearts are heavy and our bodies are exhausted as we continue the process of unlearning. We didn’t mention the 4th of July (Independence Day here in the U.S.) last week because we didn’t remember that it was coming up. Camille has many fond memories of celebrating this day with food, fireworks, and family. Never once did she stop think what this holiday is actually celebrating. She was taught that we were celebrating a great feat of independence, but today we are wondering independence for whom? While the core values claimed by the Declaration of Independence ‘life, liberty, and the pursuit of happiness’ seem worthy of pursuit, the fact is that it was only White cis-gendered heterosexual Christian colonists who were meant to receive these benefits. On July 4th, 1776 when the colonies adopted the Declaration of Independence chattel slavery was both legal and integral to the economy of the colonies. As the settlers claimed independence from the British Empire, we did so on stolen lands while committing genocide of indigenous people. This year we are seeing amazing protests sweep the world asking that our institutions stop killing Black people because of the color of their skin. While in 2020 chattel slavery isn’t supposed to exist anymore the prison industrial complex partners with police brutality to a similar affect. Feeling lost at how to reply to well-intentioned folks wishing her “happy 4th of July”, Camille used Rachel Cargle’s wise words “happy for who?”.

We are sitting with the questions of how to hold all of this knowledge. How do we hold the fond memories, the love of the values that should be core to our existence as a country, and also the death and brutality that this nation is built on. And, as we face this knowledge, how do we move forward? What do we do now that we know this? If you’re also having these thoughts reach out to us through email or text. If you’re also wondering how to hold the complexity of the life we are living, we are too. Let’s do this together.

This week we are celebrating with gratitude the full moon, the long July nights, and having fresh berries in season! In honor of these berries we’ve decided to share Camille’s favorite pitaya bowl recipe. We recognize that this bowl will be pretty expensive if you don’t already have a number of these ingredients on hand, and we don’t recommend trying to make it without a Vitamix with a tamping attachment. Feel free to play around with your own base and toppings and let us know what you love best!

We cook at home for a number of reasons including the pandemic, food allergies, money, and our love of cooking. Also, sometimes it makes more sense to eat out. For example, some recipes require so many ingredients that buying all of them to make one dish is very expensive and creates a lot of waste. For us, pitaya bowls often fall in the ‘makes more sense to eat out’ category. However, if you do want to make pitaya bowls from scratch at home, have some money to spend on ingredients, and have a Vitamix blender with tamping attachment then we highly recommend this pitatya recipe. It is sweet, fruity, salty, hearty, and delicious!

IMG_3673.jpeg

Time: 15 minutes

Serves: 1

Ingredients

for the pitaya base:

6 oz almond milk

6 oz frozen banana (if you have 24 hours you can chop your own banana and freeze the night before)

6 oz frozen mango

1 pack of frozen pitaya

1 tbsp chia seeds (optional)

1 tsp maca root powder (optional)

for the topping:

1/2 cup granola (gluten-free option)

2 tsp coconut oil, melted (optional)

1/4 tsp spirulina powder (optional)

1/2 banana, sliced

2 strawberries, sliced

12 blueberries (roughly)

1 tbsp chopped salted almonds, lightly toasted

2 tbsp peanut butter (we love Once Again for the flavor)

1 tbsp coconut flakes

2 tbsp coconut whip cream

1 tsp bee pollen (optional)

honey drizzle (as much/little as you like, if you don’t have coconut whip you might want extra honey)


IMG_3671.jpeg

If you want to experience the spirluna coconut ‘shell’ then start by melting the coconut oil and stir in the spirulina powder. If you aren’t using this you can start by slicing your almonds, and toasting them lightly in a dry pan.

Put all the pitaya base ingredients in Vitamix blender and blend on high using tamper to make sure everything gets fully incorporated. Be careful not to over-blend. Aim for a sorbet-like texture.

To assemble, layer the granola then the pitaya base. Next drizzle the warm coconut oil/spirulina mixture over the pitaya base (optional). As it cools it will form a coconut oil shell. On top of this, put sliced banana, sliced strawberry and blueberries around the bowl. Add the peanut butter in a clump and the coconut whip cream in a clump. Sprinkle the toasted almonds on top of the peanut butter and then sprinkle the whole bowl with coconut flakes. Top the whip cream with the bee pollen and then drizzle the entire bowl with local honey. Enjoy!

IMG_3669.jpeg

Curried Chickpea Salad

We’re grieving the loss of summer potlucks, picnics, and days at the beach with friends. Normally we would bring this chickpea salad, a bag of local cherries, and some chips to the river and just relax all day. With COVID, we’ve been traveling less but we still enjoy eating this delicious salad. I like to toast bread, cover it with mayo and then add this salad for a chickpea salad sandwich!

IMG-0069.JPG

Serves: 4 as side

Time: 20 minutes + chickpea cooking time

Ingredients

3/4 cup halved red grapes

2 cans chickpeas (1 1/3 cup dry*)

for the sauce:

1/2 med onion (1 cup) chopped

2 tbsp cooking oil

1 1/2 tsp curry powder

1/4 cup vegan mayo (soy-free option)

1/2 tsp salt

juice of 1/2 lemon (2 tbsp lemon juice)


IMG-0070.JPG

Slice grapes in half and chop the onion. Saute the onion in oil until it’s starting to be translucent, about 10 minutes.

While the onion is cooking, mash the chickpeas in a medium bowl. When mashing, the texture is important. You are looking to crush the chickpeas into a meaty texture but you do not want to over-mash as you could end up with hummus! Toss the chickpeas with the lemon juice and salt and set aside.

Once the onions are translucent, add the curry powder, stir for an additional minute and then remove from heat. In the pan you cooked the onions in, add the mayo, stirring to combine. Pour sauce into mashed chickpeas and stir to coat. Fold in the grapes and enjoy!

*Cooking Chickpeas from dry:

In the Instant Pot:

To cook the chickpeas, in an Instant Pot, add 1 1/3 cup of dried chickpeas to the pot.  Cover the beans with water (in the small Instant Pot this is about 6 cups of water), season with 1 tbsp kosher salt, 1 tsp turmeric, 1/2 tsp ground ginger, and 1/8 tsp cayenne.  Set the Instant Pot to pressure cook for 35 minutes letting depressurize naturally. Drain and rinse before adding to the dish.

On the stove:

If you don’t have an Instant Pot, you can easily cook chickpeas from scratch with a little planning. First you will need to soak the chickpeas which can be done one of two ways. 1. you can soak them overnight making sure they have enough water and space to double in size or 2. you can put them in a pot and bring to boil, then turn off the water and let soak for one hour. Again, make sure you have enough water and space that they can double in size.

Once you have soaked your beans, rinse them and then put in a pot with salty water. These will be cooking for about 2 hours so you don’t want as much salt as you would use for pasta, but you do want to add enough that you can taste the salt. The best way to get good at this is to practice. Each time you salt the water, taste it and when the beans are done taste them to see if they are well salted. A well salted bean should taste flavorful but not salty. If it tastes like you are eating salt, you added too much. If the bean lacks flavor then you didn’t have enough salt.

For this recipe, also add 1 tsp turmeric, 1/2 tsp ground ginger, and 1/8 tsp cayenne to the chickpeas as they cook. Cook the chickpeas until they are soft but not falling apart (this will take 1.5-2 hours).  We recommend checking the beans at about an hour and then every 20 minutes until they are soft but not disintegration. Make sure your pot has enough water as I have definitely cooked all the water off before and burnt the beans! This may seem like a lot of work, however once you get the hang of it the work is almost all passive and the reward is high: chickpeas cooked from scratch taste much better and are much cheaper!

Lettuce Wraps

We love how the crunchy, sweet lettuce pairs with this soft and savory tofu in these wraps. The combination of textures and flavors is as satisfying as the dish is pleasing. Camille’s favorite lettuce varietal is black seeded simpson lettuce and that is what we recommend, however these taste delicious with any lettuce varietal.

fullsizeoutput_e12.jpg

Serves: 2

Time: 1 hr

Ingredients

2 tbsp sesame oil

1 package of firm tofu

1 tbsp corn starch

2 cloves garlic, minced

1 very small onion, diced

1 cup minced mushrooms

1 cup finely cut cabbage

1 cup grated carrot

2 green onions, sliced

1 head lettuce

salt and pepper

for the sauce:

1/4 cup tamari (gluten-free soy sauce)

2 tbsp rice vinegar

1 inch ginger, peeled and minced

1/2 tsp maple syrup

1 tbsp almond butter


Whisk the sauce ingredients in a medium bowl until the almond butter is broken up. Mince garlic and ginger, and dice onions and stir into the sauce until coated. Set aside.

Heat a pan to medium high heat with sesame oil. Once hot, crumble the tofu into the hot oil. Sprinkle with corn starch and stir to coat. Let cook about 7 minutes, until the bottom of the tofu has started to brown. While tofu is cooking, cut the cabbage and mushrooms and grate the carrots. Add the mushrooms and cabbage and cook with the tofu, stirring regularly until the cabbage softens about 7 minutes. Then stir in garlic, onions, ginger and sauce mixture. Cook until onions are translucent, about 10 minutes. Stir in carrots and green onions. Season with salt and pepper to taste.

Wash the lettuce and pull apart into individual leaves. Scoop tofu mixture into lettuce leaves and enjoy!

IMG_2417.JPG

Green Goddex Fried Tofu

Introductions are something we struggle with. Often we just want to share a recipe with y’all, but we realize that it’s socially normal to also say things about the recipe or the world in the intro. Additionally we love using our platform to speak up and share what we’re learning and hearing as we do anti-oppression work. This week our big yes is a short intro, so here it is:

This is one of our favorite game snacks. We imagine it would be good to eat while watching a sports ball game, we eat it when having board game or D&D nights. Paired with our Pea-tatoes from last week it makes a delicious dinner.

processed_20200316_191009.jpg

Serves: 4 as a side

Time: 1 1/2 hrs (1 hour active time)

Ingredients

for the marinade:

2/3 cup tamari (gluten-free soy sauce)

1/2 cup water

1 tbsp maple syrup

1 tbsp balsamic

1 tsp ground ginger

1 tsp garlic powder

pinch of cayenne

for the tofu:

2 blocks of tofu

1/2 cup cornstarch

1 tsp salt

for the sauce:

3/4 cup soaked cashews

1 clove garlic

1 tsp salt

2 tbsp lime juice

1/2 tsp apple cider vinegar

1/2 cup packed basil leaves

2 cups loosely packed cilantro with stems

1/2 cup water


processed_20200316_191030.jpg

Cut your blocks of tofu in half so that you have four, one inch thick rectangles. Press tofu between two kitchen towels, placing a cast iron pan, or something heavy on them to remove some of the liquid. This process can be done with a tofu press. While the tofu is draining, combine all the marinade ingredients and whisk until smooth. Slice the tofu into cubes or thick sticks toss in the marinade mixture. Allow tofu to sit in mixture for 30 minute, making sure to gently turn the tofu after 15 minutes so that everything receives marination.

Combine the cornstarch and a generous pinch of salt in a shallow bowl. Drain the marinade (you can save this in a jar and use if for a different dish). Toss the tofu a couple of pieces at a time in the cornstarch mixture until coated on all sides. Heat 2 tbsp of neutral oil in a frying pan. Once hot, fry the tofu in batches on med-high making sure it gets golden brown on all sides. Be careful not to crowd the tofu as that will make it all stick together. We use tongs to turn each piece separately.

To make the sauce, drain the cashews from the water they were soaking in and add them and the remaining sauce ingredients to your blender and blend until smooth. Serve the tofu in a bowl with sauce on the side. Dip and enjoy!

Garlicky mashed pea-tatoes

Sometimes we feel all the things. Joy and grief can co-exist. We want to start with the joy we feel that the global uprisings in response to the murder of George Floyd, Breonna Taylor, and countless others are creating change! For those of you on the front lines protesting, for those of you sending money to support the uprisings, to the countless hours of un-paid Black labor that went into organizing this moment, and for all the labor that continues we thank you. Thank you for standing up to systemic racism and oppression, thank you for your work. Let’s celebrate together that the Minneapolis City Council is supporting de-funding police! Our voices can be heard. There is a long way to go and we need all of us in this work.

We also hold the grief of the immense amount of Black death and suffering that has, is, and will continue to happen until we can take down systemic racism. This is a lot to hold for us. If you are new to this work, and you are just seeing the injustice and inequity remember to be soft with yourself. We need you here today, tomorrow, and in 50 years. This moment didn’t come from nowhere, and the fight will continue. We trust that you are and will keep doing your part.

One thing we do to care for ourselves is eat lots of comforting foods. Comfort food looks different for everyone. For me, comfort food is usually something with a good amount of fat and salt preferably potato based. Also, any food that brings me back to sweet memories from my past is so comforting. It’s also a good reminder that food is never just one thing. White supremacy and diet culture often reduces food to it’s nutritional value. Food is so much more than nutritional value and it’s time that we re-contextualized the way that we think about it. Today, for me, that means remembering that comfort food can be relational. This recipe isn’t just about getting calories into my body (which is important and I’m thankful to be able to do). It’s also about remembering a deep friendship 30 years in the making and continuing.

This recipe is something Anne started making before she turned 10. At an early age we were already experimenting with different food combinations and enjoying inventing in the kitchen. We used to make ‘soup’ by throwing lots of random ingredients (whatever we could reach) into a pot of water and then telling our parents we had cooked for them. They were good sports, always saying how much they loved the food we made (even though we’re pretty sure they were only pretending to eat it). At one point, Anne started mixing peas into their potatoes and dubbed them pea-tatoes. For years, neither of us would eat mashed potatoes without peas (I’m sure our parents loved this new rule).

I’m making this for dinner tonight and I’m remembering how lucky I am to have such a deep friendship with this beautiful human who creates amazing food. I’ll be connecting to how the calories fuel my physical body and how the memories connect me to sweetness. This will be part of my survival kit. #covidcooking.

processed_20200504_113416.jpg

Pictured above: Anne + Camille cooking together at a young age.

processed_20200316_191009.jpg

Serves: 6 as a side

Time: 45 minutes (20 minutes active)

Ingredients

6 medium potatoes (I like the red ones)

1 head garlic 

A drizzle of olive oil

2 tbsp salt

3/4 cup cashews + water to soak them in

1/2 cup water

1/4 cup olive oil

1 cup frozen peas


Preheat the oven to 375 F. Cover the cashews with water and put them in the fridge until you make the mashed potatoes. Roast the garlic. You can do this a number of ways and our two favorite are to use a garlic roaster or a small cast iron pan. If you are using a garlic roaster chop the tops off the garlic, drizzle a bit of oil into the garlic cloves, put this into the garlic roaster and roast in the oven for about 45 minutes. To use a small cast iron pan, peel the garlic and place cloves in the cast iron pan with a small amount of olive oil. Roast this in the oven for about 20 minutes, stirring every 10 minutes. Either way, the garlic should look golden brown and be very soft. With the cast iron method, it is easier to burn the garlic so make sure to check on it.

Quarter and boil the potatoes in very salty water until tender. The water should taste about as salty as sea water so that the potatoes soak in the water and are perfectly salted when done. Don’t worry if these feels like a lot of salt; you will be draining the water. Cook potatoes until almost tender, about 6 minutes, then add the peas to the boiling water, cook for another 4 minutes. Drain the peas and potatoes when the potatoes are fork tender.

Drain the soaked cashews and add them to a blender (we like the Vitamix) with 1/2 cup water until smooth. You can test for smoothness by rubbing some between two fingers. If it feels at all gritty, keep blending. Mash the cooked peas and potatoes with the roasted garlic, cashew cream, 1/4 cup olive oil, and nutritional yeast. We do not recommend mashing with a hand mixer as this can make your potatoes gluey.

Chickpea Crepe with Carrot Top Cheese

George Floyd, Breonna Taylor, and Tony McDade; it feels important to us to acknowledge these three Black people who were recently murdered by the police. Right now we are feeling grief, loss, anger, anxiety, and extreme sadness that we live in a society that deems White people worthy and needing protection while condemning Black people as something to fear and kill. Rachel Lewitt, one of Camille’s mentors, pointed out that we are currently seeing some of the largest demonstrations since the 60s, and we can create radical change y’all. We can resist!

We’ve been noticing a lot of White people just now realizing that racism still exists, feeling the injustice, and wanting to take action. Some of the things coming up for White people right now are anger, fear, being overwhelmed, confusion, the feeling of wanting to use our white privilege to end racism, the need to fix this, wanting to be good and do the right thing, and wanting to take action. Awesome, we need all of us in this work! We all need to be fighting racism wherever it shows up and if you are reading this and you are White, racism lives in your body, and ours too. To be White in the US is to be indoctrinated into the lies of white supremacy culture. To be White in the US is to be racist. If you feel activated by these statements, that is a normal response and is part of what will keep you from being able to do the work.

If you’d like to talk to us about this, reach out to us at chickpeasandspice@gmail.com. We’re here to process this with you, no judgement. This is inside our bodies too and until we all look at it, face it, understand it, and extract it we will continue to do harm.

Rachel Lewitt, a wake-up leader in Portland, who is deeply inspired by and mentored by Holistic Resistance says, “when White people become under-resourced, we become even more dangerous”. Right now we are living through the global trauma of a pandemic as well as the trauma of living under the oppression of white supremacy culture. If you, like me, are new to seeing the ways in which white supremacy culture systemically targets and kills black people as well as erasing indigenous people this can be a lot to take in. Remember to go slow. Don’t expend all your energy this week yelling and then assume you have done your part. As Aaron Johnson from Holistic Resistance says, “this is a marathon”. Our question is why are you doing this work? What will keep you doing this work?

If you aren’t White, we hope you are getting rest, nourishment, and time for whatever it is that you need.

One of the ways we resource ourselves is to cook delicious food and eat it. This is our most recent joyful recipe: A delicious crispy chickpea crepe with cheesy carrot top cheese and fresh sugar snap peas topped with tangy pickled onion. May it bring you nourishment that will help sustain you as you do the deep work of opposing racism where it comes up both internally and in the world.

Crepe 2.JPG
processed_20200523_135155.jpg

Serves: 2-4

Time: 1 hr

Ingredients

2 cups sugar snap peas

1/2 tsp salt

1/4 cup oil for frying

For the Pickled Onion

1 tiny onion

Juice of half a lime

1/2 tsp salt

For the Carrot Top Cheese

1 cup cashews soaked

1 tbsp olive oil

3 tbsp water

1/2 tsp salt

1/2 tsp garlic powder

1 clove garlic

juice and zest of 1/2 lemon (about 2 tbsp lemon juice)

small handful of carrot tops

2 tbsp nutritional yeast (optional)

For the Chickpea Crepe

1 1/2 cups chickpea flour

1 1/4 tsp sea salt

1 3/4 cups water

3 tbsp olive oil

3/4 tsp rosemary


Cover cashews with cold water and put in the fridge to soak for 30 minutes. Thinly slice the onion and add it and the salt and lime juice to a bowl. Set the onions aside to pickle, this takes at least 30 minutes. If you have some leftover, they keep in the fridge. Store them with the liquid. Mix the chickpea flour, salt, water, olive oil, and rosemary and whisk until smooth and let sit for 30 minutes.

Remove the ends from sugar snap peas. Heat pan with a high heat oil until it is medium to high heat. Add the sugar snap peas and cook until blistered and golden brown on one side. Flip. Salt while the second side cooks. Remove from heat when the second side has golden brown parts and set aside.

Combine all the cheese ingredients and blend until smooth, scraping down the sides of your blender or food processor as you go. The cheese keeps for 1 week. You can freeze and use it later if you don’t need the whole batch.

You can use either a food processor or a Vitamix blender for this. Using a food processor will give the cheese slightly more texture and a Vitamix will make the cheese extra silky/creamy. Both are good! I would not recommend trying to make this cheese in a blender that isn’t high powered, as the nuts can be hard on the motor and the cheese will come out with a strange texture. Note, I don’t always soak the cashews and can say from first hand it isn’t 100% necessary when using a Vitamix. It does however help take care of your equipment and can make the final product creamier, so I do recommend it, if you have the time. Because this is a thicker cheese recipe, if using a Vitamix we recommend using the tamper while blending. If you don’t have this you can add a bit of extra water to help with the blending process.

Using the same pan (clean first if there is any residue), heat a small amount of oil. Once the oil is hot, add 1/3 cup of chickpea batter to the hot pan. Tilt the pan to spread out the batter, and cook until golden brown and crispy on one side. Be patient, when the bottom is golden brown and crispy, the edges of the top will start to show color. Flip the crepe over and cook until speckled with golden brown on the second side. Cooking crepes to have a crisp but flexible texture takes some practice. Some tips are make sure your oil is hot before you add the batter. Don’t add too much batter. Allow the first side to cook until an even color is achieved before flipping. Remember, the first pancake rule applies to crepes as well. Your first crepe might come out under cooked and crumbly. Don’t be discouraged, keep cooking, be patient, and future crepes will be better.

We often cook as many crepes as we want to eat when we first make this dish. We then refrigerate the batter and fry fresh crepes for leftovers. When cooking batter that has been refrigerated, make sure to stir thoroughly before frying and if it is too thick, you can add a little water to thin it out.

To assemble the crepes, spread some carrot top cheese onto the crepe, top with sugar snap peas and onions. Try not to transfer too much of the lime juice when you transfer the onion onto a crepe. Roll them up and enjoy!

Chickpea Crepe with Broiled Asparagus

Many cultures worldwide have a pancake or crepe traditionally made with bean flour.  In Northern India there is the chilla, in Western India, the pudla.  In Italy, it is called socca or farinata. Each of these variations is made with different traditional ingredients and techniques.  Inspired by these recipes, today we are sharing how to make a thin, crisp gluten-free crepe that can be easily wrapped around filling. It’s spring time where we live, so our filling today will feature asparagus as it’s one of our all time favorite spring treats.

processed_20200504_191306.jpg

Serves: 2-4

Time: 1 hr

Ingredients:

1 bunch asparagus

zest from 1/2 lemon

1 bunch spring onions

salt

olive oil

For the pesto

1 bunch spinach, de-stemmed and thoroughly rinsed

1/4 cup sunflower seeds

2 cloves garlic

1/4 cup olive oil

1 tsp salt

3 sun-dried tomatoes, soaked and drained

2 tbsp nutritional yeast

zest of 1/2 lemon

2 tbsp lemon juice (start with less to try)

For the Chickpea Crepe

1 1/2 cups chickpea flour

1 1/4 tsp sea salt

1 3/4 cups water

3 tbsp olive oil

3/4 tsp thyme


To make the chickpea crepes, whisk together chickpea flour, salt, water, olive oil, and thyme and allow to sit for 30 minutes. While crepe batter is sitting, make the spinach pesto. Start by soaking the sun-dried tomatoes in hot water until they are plump and re-hydrated. Note, if you are using sun-dried tomatoes in oil then you can skip this re-hydrating step.

Thoroughly clean and then blanch the spinach. To blanch, bring a small pot of water, well salted, to a boil. Put a bowl of ice water next to the stove. Add the cleaned spinach to the boiling water and cook about one minute. Remove with a slotted spoon and immediately immerse in ice water. Squeeze as much water out of the spinach as you can and drain the sun-dried tomatoes. Add both to a food processor or blender along with the rest of the ingredients from the ‘For the Pesto’ list. Blend until smooth and creamy.

Heat a small amount of oil in large flat pan. Once the oil is hot, add 1/3 cup of chickpea batter to the hot pan. Tilt the pan to spread out the batter, and cook until golden brown and crispy on one side. Be patient, when the bottom is golden brown and crispy, the edges of the top will be starting to show color. Flip the crepe over and cook until speckled with golden brown on the second side. Cooking crepes to have a crisp but flexible texture takes some practice. Some tips are make sure your oil is hot before you add the batter. Don’t add too much batter. Allow the first side to cook until an even color is achieved before flipping. Remember, the first pancake rule applies to crepes as well. Your first crepe might come out under cooked and crumbly. Don’t be discouraged, keep cooking, be patient, and future crepes will be better.

Turn on the oven to broil. Rinse the asparagus and trim about 1/2 inch off the bottom. Arrange on a baking sheet and drizzle with olive oil. Sprinkle about 1/4 tsp of salt and put in the broiler. Note, depending on your oven, this could be the top shelf, or a drawer at the bottom. Broil the asparagus for 7 minutes, remove and flip, and broil another 7 minutes for a total of 14 minutes of cooking time. The asparagus should be golden brown. Set aside to cool slightly. Once these are cool enough to touch (but still warm) slice into 1 inch long pieces. This is an optional step, but will make the food much easier to eat as otherwise the asparagus can become stringy when you bite into it.

Cut the spring onions lengthwise into thin pieces 3 inches long each. Fry in oil until golden brown. Salt and remove. Put them on a plate or piece of paper bag.

To assemble, spread the pesto on the crepe then add asparagus. Sprinkle with crispy spring onions and lemon zest. Form this into a hand wrap and enjoy!

Garlic Scape Spread

Scapes are in season and we learned to make this spread from Laura at River Bank Farm. We love making a bunch of this and keeping it in the fridge for delicious local garlic all summer long. Often we use scape spread as a replacement for minced garlic, which cuts down on cooking time. It is also a delicious spread to add to sandwiches.

scapes.jpg

Serves: 16 oz

Time: 10 min

Ingredients:

Scapes (about two handfuls), coarsely chopped

Olive oil (1/4 cup or less)


Blend the scapes and olive oil in a food processor until fully pureed. Store the mixture in a jar in the fridge and use a tablespoon as a replacement for 3 cloves of minced garlic in any stir fry, salad dressing, soup, stew, etc. If you have an abundance of scapes, make some extra and store it in the freezer to use when you run out of your first batch.

scapes 2.jpg

Tangy Nut Butter Noodles

We like to keep carrots and cabbage in the fridge because they take a long time to go bad; if stored well these can keep for many months! Because of this recipe, we always keep the other ingredients (soy curls, thai noodles, and nut butter) stocked in my pantry. During the before times, when we had guests over or have run out of food ideas we always had a back up meal already planned. We also loved feeding this to guests because it makes a lot and is fairly cheap. Plus, white people are often excited that it is not the usual ‘American’ fare. Now, we are happy this is a low effort meal that makes our bodies feel good that we can pull together if we aren’t feeling like putting in much effort.

A note on tamarind. We like to buy jarred tamarind paste and keep it in our fridge, as it is a great acid to add to many meals. If you can't find packaged tamarind paste, however, no worries -- dried tamarind pulp is available at many Asian and Latin American grocery stores, and you can use the pulp to make your own paste. Soak the brick of pulp in hot water until it's cool enough to touch, then break it down with your hands to incorporate the water and release the flavor. Run the thick paste through a sieve to strain out the pods, and keep in the fridge or freezer. You can simmer the resulting liquid until it is a thicker paste, but that is a question of personal preference.

processed_20191114_204248.jpg

Serves: 4

Time: 1 hr

Ingredients

2 large carrots (3/4 lb)

1 lb cabbage (4 cups, packed)

1 package pad thai noodles

5 tbsp neutral oil for frying vegetables and soy curls, divided

1/4 cup toasted peanuts or almonds, chopped

1/4 cup cilantro, chopped

for the soy curls:

4 oz soy curls

1 bouillon cube or 1 tsp Better than Bouillon paste

1 1/2 cups hot water

for the sauce:

1/4 cup peanut or almond butter

1 tsp lime zest

2 tbsp lime juice

1 tablespoon sesame oil

1 tsp sriracha

1 tsp tamarind

3 tbsp soy tamari (gluten-free soy sauce)

2 tbsp water


Slice carrots into 2 inch long julienne and chop cabbage. Dissolve bouillon in hot water and soak the soy curls for 10-15 minutes. They will re-hydrate and should soak up all of the water that you put in. Heat 2 tbsp of neutral oil to medium heat in a pan. Add the veggies and fry until the carrots are starting to brown and the cabbage is starting to crisp. This takes about 10-15 min.

In the meantime put a pot of well salted water on to boil. The water should taste about as salty as sea water so that the noodles soak in the water and are perfectly salted when done. Don’t worry if these feels like a lot of salt; you will be draining the water. Once boiling, add the noodles into the water and cook until soft (check noodle package for instructions). Once you drain them, remember to rinse with lots of cool water to prevent clumping. Remove the veggies from the frying pan and set aside. Heat the veggie pan with 3 tbsp of oil and fry the soy curls until brown and crispy, about 15 minutes.

Whisk together nut butter, lime juice and zest, sesame oil, sriracha, tamarind, tamari, and water. If your nut butter is clumpy, we recommend stirring the lime juice into the nut butter first to work out the clumps before adding the rest of the ingredients. Also if your almond butter is very thick you may want to add some water to make the sauce thinner. This isn’t necessary, but makes stirring easier.

Toast the nuts in a dry pan until slightly darker in color. Chop the almonds or peanuts and cilantro. Toss the veggies, soy curls, and noodles with the sauce and serve warm, garnished with cilantro and toasted nuts. Enjoy!

Cardamom Mango Smoothie

Anne first had a mango lassi when they were twelve and loved it. Their body does not enjoy mango lassis made the way that first one was made, but this mango smoothie is reminiscent and delicious without the ingredients that don’t work for our bodies. Feel free to play around and make it your own!

processed_20200416_135715.jpg

Serves: 1 16 oz drink

Time: 10 minutes

Ingredients

1 cup (8 oz) of your preferred non-dairy milk (soy-free option, nut-free option)

3/4 cup frozen mango

3 - 6 pitted medjool dates, pits removed

1/2 tsp freshly ground cardamom


Add nut milk and dates to a high speed blender and blend until the dates have incorporated into the liquid. Add mango and cardamom and blend until smooth. Enjoy!

Black Beans and Rice with Cilantro Crema

When we were kids, our understanding of vegetarians was all they ate were black beans and rice. We now know that isn’t true at all, however we do love going back to this as a staple. Warm rice and beans with zesty cilantro cream on top is straight up delicious. It’s also quick and it’s easy to substitute whatever veggies you have on hand to help you clean out the fridge. Also, if you don’t have sunflower seeds you can substitute cashews or pumpkin seeds in the crema. If you aren’t using an Instant Pot to cook your beans, you will need to add 2-3 hrs of bean cooking time in addition to an overnight soak. We don’t recommend using canned beans for this recipe since much of the flavor comes from how the beans are cooked.

Black beans and rice is a staple in many cuisines and we didn’t want to post this without talking briefly about cultural appropriation. Part of being raised and socialized white in the US is not being taught our rich ancestral traditions and ethnic origins. These were purposefully taken from us in the 1600s during the process of making us white and others non-white. Not having those rich historical traditions at our fingertips, and being settlers on a foreign land, it is easy to be hungry for traditions be they spiritual, musical, artistic, or food/recipes. For us, the food culture we grew up with was largely invented in the 1950s and revolved around meat. When we moved away from those food traditions, we felt like we were missing something. We had no cultural knowledge of how to cook vegetables deliciously or how to have a varied diet that fed all our body’s needs. It is here that we need to acknowledge that many of the foods and food preparations we learned were from cultures other than our own. Often ones that have been historically dominated by white people. How do we justify sharing these recipes that are neither all our own nor authentic to an originating culture? How do we know when we are appropriating and when we aren’t?

We don’t have the answers to these questions and we aren’t going to stop ourselves from living in hopes of not doing harm (harm is inevitable). What we offer is this: here is one of our recipes for a staple from a culture that isn’t ours. Cook with it, enjoy it, and if you feel harmed by us sharing it please let us know - we are ready and open to learning publicly. If you are interested about learning more on cultural appropriation check out one of our favorite articles or favorite podcast episode on the topic.

What’s Wrong with Cultural Appropriation? These 9 Answers Reveal Its Harm

In a Metal Mood - Revisionist History

processed_20200227_194922.jpg

Time: 1 hr with Instant Pot

Serves: 6

Ingredients

1 avocado

For the Beans:

1 1/3 cup dry black beans

1 clove garlic

1 tbsp kosher salt

2 tsp cumin

1/4 tsp chili

sprinkle of cayenne

squeeze of lime

For the Rice:

1 1/2 cup brown rice

3 cups of water (or stock)

1 tsp bouillon (gluten-free option; soy-free option)

1/4 tsp salt

3 tbsp minced cilantro

squeeze lime

For the Veggies:

1 tbsp olive oil

1 small onion, thinly sliced

2 medium bell peppers (I like yellow and orange), thinly sliced

1 small zucchini, cut in half coins

1 tsp cumin

1 tsp salt, divided

squeeze of lime

For the Sauce:

2/3 cup sunflower seeds

1 cup water

1/2 bunch cilantro

juice of half a lime

3/4 tsp salt

1/2 tsp sriracha


Soak the sunflower seeds in a bowl of water.

Add the all bean ingredients to an Instant Pot. Cover the beans and seasonings with water (in the small Instant Pot this is about 6 cups of water). Set the Instant Pot to pressure cook for 19 minutes letting depressurize naturally. Drain and rinse the beans before adding to the dish. If you don’t have an Instant Pot, see bean cooking instructions at the bottom*.

While the beans are cooking, put rice and water in a small pot. Bring to a boil add bouillon and salt, stir to dissolve. Reduce to a simmer and simmer about 45 minutes or until the rice has absorbed all of the water. Remove from heat, stir in cilantro, and a squeeze of lime juice.

While the rice is cooking, thinly slice the onions and bell peppers. Cut the zucchini into half coins. In a frying pan heat 2 tbsp olive oil and 1/2 tsp salt. When the oil is hot add onions and cook until starting to brown, about 7 minutes. Add the bell peppers and zucchini and fry. When veggies start to turn oily, after about 2 minutes add the remaining salt and cumin. Continue frying until golden brown, about 5 more minutes. Remove from heat and add a squeeze of lime.

To make the sauce, drain the soaked sunflower seeds and add them with the other sauce ingredients to a high powered blender and blend until smooth. Taste and season accordingly.

Slice avocado and add a pinch of salt and a squeeze of lime juice.

To assemble: layer rice, beans, veggies, and top with sliced avocado and a thick drizzle of sauce. Enjoy!

*To Cook Beans without an Instant Pot:

If you don’t have an Instant Pot, you can easily cook beans from scratch with a little planning. First you will need to soak the beans which can be done one of two ways. 1. you can soak them overnight making sure they have enough water and space to double in size or 2. you can put them in a pot and bring to boil, then turn off the water and let soak for one hour. Again, make sure you have enough water and space that they can double in size.

Once you have soaked your beans, rinse them and then put in a pot with salty water. These will be cooking for about 2 hours so you don’t want as much salt as you would use for pasta, but you do want to add enough that you can taste the salt. The best way to get good at this is to practice. Each time you salt the water, taste it and when the beans are done taste them to see if they are well salted. A well salted bean should taste flavorful but not salty. If it tastes like you are eating salt, you added too much. If the bean lacks flavor then you didn’t have enough salt. You should also add the other bean seasonings listed in this recipe.

Sheep Lover's Pie

This sheep lover’s pie is our take on a more traditional ‘shepherd’s pie’. The layering of peppered mushrooms, sweet carrots and cabbage, edamame, and fresh swiss chard makes a savory sensation you won’t want to miss! Topped off with our famous garlicky potatoes we always get excited when we have leftovers to eat day after day.

We love this dish because it is easy to use up whatever is in your fridge or whatever your farm has in stock. Speaking of farms, now is a great time to remember we still need to support our local farmers if we want to continue to have access to delicious local food!

If you live in the Portland area consider buying online from The Side Yard Farm https://www.thesideyardpdx.com/. If you live in the Seattle area, Kirsop Farm https://www.kirsopfarm.com/ has an online shopping option. If you live in Roxbury, Connecticut, Riverbank Farm has an online option with a pick up at the garage: https://www.riverbankfarm.com/.

We are great believers in the value of small local farms and farmer’s markets. Right now, many small farms are struggling because a large part of their revenue comes from farmers markets. Social distancing, and in some places closure of markets, means that farms can use any help they can get. Shopping directly from local farms is one way to help, another is to give to local funds that offer grants to farms who have lost revenue. A great way to figure out how to help is to check out your local farmer’s market website.

On the subject of giving back, many of us will have seen, or will soon see, stimulus checks in our bank accounts. As white settlers we are keenly aware that, due to systematic oppression, the pandemic is having disproportionate impact on black, indigenous, and people of color. For example, stimulus checks are being distributed widely, independent of level of need. This means that those continuing to work and seeing less impact receive as much as or more than the most impacted.

For those who have lost jobs or were already in a precarious place, the stimulus checks are a great boon, but Anne’s family looked at their situation and decided that the additional income is not as essential to them as it is could be to others who are bearing the brunt of this global pandemic. They chose to give their stimulus check to local organizations supporting those who are most impacted by the pandemic. We offer this thought: do you need your stimulus check? If you don’t, please consider giving to organizations in your area that are supporting those who do.

If you want some ideas of organizations check out: https://www.sharemycheck.org/

processed_20190830_130018.jpg

Serves: 4

Time: 2 hours (1 hour active time)

Ingredients

4-6 red potatoes (1 1/3 lb), quartered with skin on

3 tbsp salt, divided

1 head garlic 

3/4 cup raw cashews and water to soak

1/2 cup water

1/4 cup nutritional yeast

1 cup olive oil, divided

3 cups sliced cremini (1/2 lb), sliced

1/2 tsp pepper

1 medium onion (1 1/2 cups), chopped

2 medium carrots (1/3 lb), cubed

1/2 lb cabbage, chopped

1 cup frozen peas

1 cup frozen edamame

5 leaves of chard, de-stemmed and chopped


Preheat the oven to 375 F. Cover the cashews with water and put them in the fridge until you make the mashed potatoes. Roast the garlic. You can do this a number of ways and our two favorite are to use a garlic roaster or a small cast iron pan. If you are using a garlic roaster chop the tops off the garlic, drizzle a bit of oil into the garlic cloves, put this into the garlic roaster and roast in the oven for about 45 minutes. To use a small cast iron pan, peel the garlic and place cloves in the cast iron pan with a small amount of olive oil. Roast this in the oven for about 20 minutes, stirring every 10 minutes. Either way, the garlic should look golden brown and be very soft. With the cast iron method, it is easier to burn the garlic so make sure to check on it.

Quarter and boil the potatoes in very salty water until tender. The water should taste about as salty as sea water so that the potatoes soak in the water and are perfectly salted when done. Don’t worry if these feels like a lot of salt; you will be draining the water. Drain the potatoes when they are fork tender.

Saute mushrooms in 1 tbsp olive oil until tender and starting to brown, about 20 minutes.  When they are soft, add the pepper. Layer the mushrooms on the bottom of a baking dish (we use an 8.5” casserole or a 12” cast iron pan).  Layer the peas on top of the mushrooms. It’s okay if they are still frozen.

Saute the onion and carrot about 10 minutes on medium high heat until the onions are translucent and the carrots are starting to brown, stirring regularly.  Add the cabbage and cook about 7 minutes longer, stirring regularly, until the cabbage has wilted and released some of its liquid.  

Drain the soaked cashews and add them to a blender (we like the Vitamix) with 1/2 cup water until smooth. You can test for smoothness by rubbing some between two fingers. If it feels at all gritty, keep blending. Mash the cooked potatoes with the roasted garlic, cashew cream, 1/4 cup olive oil, and nutritional yeast together. Taste and add salt if needed. There will be salt added to the top of the potatoes once the dish is fully assembled, so be careful not to over salt. Layer the onion cabbage mixture into the baking dish.  Salt this layer with 1 tsp of salt. De-stem the chard and chop or thinly slice. Add the edamame and chard before topping the whole dish with the garlicky potatoes.  Rough up the top of the potatoes with a fork and drizzle with olive oil. Sprinkle with salt and rough them up again. 

Bake about one hour until the top of the potatoes have some crispy, browned sections. Enjoy!

processed_20190830_130319.jpg

Asparagus Pasta

Spring is in the air, and with that our thoughts are turning towards one of our favorite vegetables: asparagus! With such a short season, we always try to take advantage by eating asparagus on everything. In this recipe asparagus is the vegetable, the garnish, and the sauce for your pasta.

Below: harvesting the last of Asparagus for the season!

Below: harvesting the last of Asparagus for the season!

asparagus growing.jpg

Serves: 4-6

Time: 30 minutes

Ingredients:

2 bunches of asparagus (skinnier is preferable)

½ lb Pasta (for GF pasta, Camille really likes Banza Chickpea Pasta)

1/4 cup olive oil, plus 2 tbsp for frying

1/4 cup sun-dried tomatoes, plus 4 extra sundried tomatoes (in oil) for garnish, chopped

1 avocado

1 cup salted water (take from the pasta water)

3 tbsp nutritional yeast

1 tbsp oregano

1 tbsp soy free Vegenaise or JustMayo

Juice and zest from 1 small lemon

½ tsp pepper

Salt to taste


Cut the bottoms off the asparagus. Set aside 1 fistful of asparagus (you will broil these for a topping). Chop the rest of the asparagus stalks in 1 inch pieces and divide into two piles. It would be good if one pile had softer pieces such as the heads and slim stems and the other pile had the chunkier stalks. Make sure you have 3 cups of chunkier stalks which you will use to make the sauce.

Boil water for pasta. Dissolve enough salt in this water that it tastes like the ocean, for us this is usually around 3-4 tbsp to about 3 quarts of water. This may seem like a lot of salt, but most of it will be washed away when you drain the pasta, and the vegetables and pasta will absorb salt during the cooking process so that the dish will taste well seasoned without needing to be salted much when it is finished. Start to cook the pasta. When it has 3 min left to be fully cooked, add the pile of softer asparagus pieces (heads and slim stalks). Let this cook for about 3 minutes. The goal is to cook the asparagus until it is bright green and tender, but not so much that it starts to lose its color. If you haven’t already, steal about a cup of water from the pot and set aside, you will use this in the sauce. Then, after about a minute or when the asparagus is bright green, drain the pasta asparagus mixture, rinse with cold water, and set aside.

While the pasta cooks, you can start cooking the sauce. Start by braising 3 cups of asparagus stalks. To braise, heat up the pan with 2 tbsp olive oil. Once the oil is hot, add the asparagus and cook until browned. Add about 1/2 cup of water and cook until asparagus is soft.

asparagus cooking.jpg

Combine the braised asparagus with the 1/4 cup sun-dried tomatoes, avocado, the cup of pasta water, nutritional yeast, oregano, Vegenaise, lemon juice (reserve 1 tsp), pepper, and salt in a food processor and puree until smooth.

While this is happening, drizzle some olive oil over the fistful of reserved whole asparagus pieces. Broil these in the oven until crispy (but not burnt). Drizzle the reserved lemon juice on the freshly roasted asparagus. Chop into inch long pieces.

Finally, combine the cooked pasta and asparagus with the sauce and top with broiled asparagus pieces and minced sun-dried tomatoes. Enjoy!


Basic Polenta Recipe

It is natural that when we experience uncertainty on the scale we are currently experiencing, we feel threatened and try to hold on tightly to what we have. That can come up as overbuying, hoarding behaviors, and distrusting others. We are trying to practice holding things more loosely and coming together (not literally) in supportive community. This in an opportunity for us to build empathy for those who have been experiencing scarcity and isolation for years and to learn from others instead of reaching for our coping mechanisms of hoarding and insulation.

We’ve been hearing about pasta shortages in grocery stores right now and instead of offering options of stores that might have pasta, we wanted to offer another grain option. Polenta is a great grain dish to serve with meals. It is wonderful with roasted veggies and beans for dinner or fried with an egg on top for breakfast.

This recipe calls for corn meal. There is specific corn meal that is ground quite coarsely for polenta, and purists would say that using finer grain corn meal makes something else, not polenta. We enjoy this dish made with whatever corn meal is available. Sometimes that means finer, sometimes coarser, but no matter where on the spectrum, we love the result.

While we like polenta best when it is made with vegetable stock, in a pinch it can be made with water and bouillon, or even just with water. We use unsalted stock, so if you opt for bouillon that is salted, keep that in mind while you cook the dish.

processed_20200113_131608.jpg

serves: 4-6

time: 1 hour

Ingredients

1 cup cornmeal

4 cups water, bouillon, or vegetable stock

2 tsp salt (less if your bouillon is salted)

1/4 cup nutritional yeast

1/4 cup olive oil

1 1/2 tbsp minced rosemary


Bring 4 cups of liquid to a boil. Pour cornmeal into the boiling liquid slowly and whisk continuously until it comes back up to a boil. Add 2 tsp salt. Turn the heat down to a simmer and whisk every time it gets close to boiling to keep from sticking to bottom of pan. Cook 45 minutes. After 35 minutes add the rosemary. Once you remove it from the heat whisk in nutritional yeast and olive oil.

The polenta will seem quite liquid when it is hot, but will firm up as it chills. If you would like to fry it, we recommend refrigerating in a shallow pan for easy slicing.

This tastes delicious scooped into a bowl with veggies on top or refrigerate to use for frying.


Sesame Tofu

During this global pandemic we are experiencing collective trauma and this will show up differently for everyone. It’s normal if the pandemic is triggering your disordered eating. It is normal to want to eat a lot of food. It is normal to feel the urge to restrict your food. All of these feelings are real and valid. We want to remind everyone that there is no wrong way to eat, there is no “good” food and “bad” food. It’s okay to eat all day. It’s okay to eat past being full. It’s okay to eat the food your body desires. It’s okay if you are experiencing lack of access to food and are eating what’s available to you. Today we are sharing one of our favorite dishes with the knowledge that, at least in Portland and Seattle, finding tofu has become a real challenge. If you can find tofu, you won’t regret having this delicious food around!

We are obsessed with this sweet, sticky, salty delightful dish! It makes a nice appetizer, can be eaten alone as a delicious snack, or goes great with many meals. Some of our favorite ways to eat this are with millet and stir fried broccoli and cabbage or with a rutabaga bake and fried garlic collard greens.

processed_20200301_193018.jpg

Time: 1 hour

Serves: 4 as a side

Ingredients

2 blocks firm or extra firm tofu

1/2 cup of cornstarch

1 tsp salt

for the sauce:

6 tbsp coconut aminos

2 tbsp tamari (gluten-free soy sauce)

2 tsp maple syrup

2 tsp toasted sesame oil

1 tbsp lime juice

1 tsp sriracha

2 tsp sesame seeds, white, black, or mixed


Cut your blocks of tofu in half so that you have four, one inch thick rectangles. Press the tofu between two kitchen towels, placing a cast iron pan, or something heavy on them to remove some of the liquid. This process can be done with a tofu press. Slice the tofu into cubes or thick sticks. Combine the cornstarch and a generous pinch of salt in a shallow bowl. Toss the tofu, a couple of pieces at a time in the cornstarch mixture until coated on all sides. Heat 2 tbsp of neutral oil in a frying pan. Once hot, fry the tofu in batches on med-high making sure it gets golden brown on all sides. Feel free to add more oil if your pan gets dry. Be careful not to crowd the tofu as that will make it all stick together. We use tongs to turn each piece separately.

To make the sauce, mix the coconut aminos, tamari (gluten-free soy sauce), maple syrup, lime juice, sriracha, and sesame seeds in a small bowl. When the tofu looks done, put all your finished batches of tofu back into the pan and pour the sauce over the tofu. Cook the tofu and sauce, stirring constantly until it becomes sticky and coats the tofu, about 3 minutes. Remove from heat and enjoy!