Chocolate Cake with Strawberry Icing

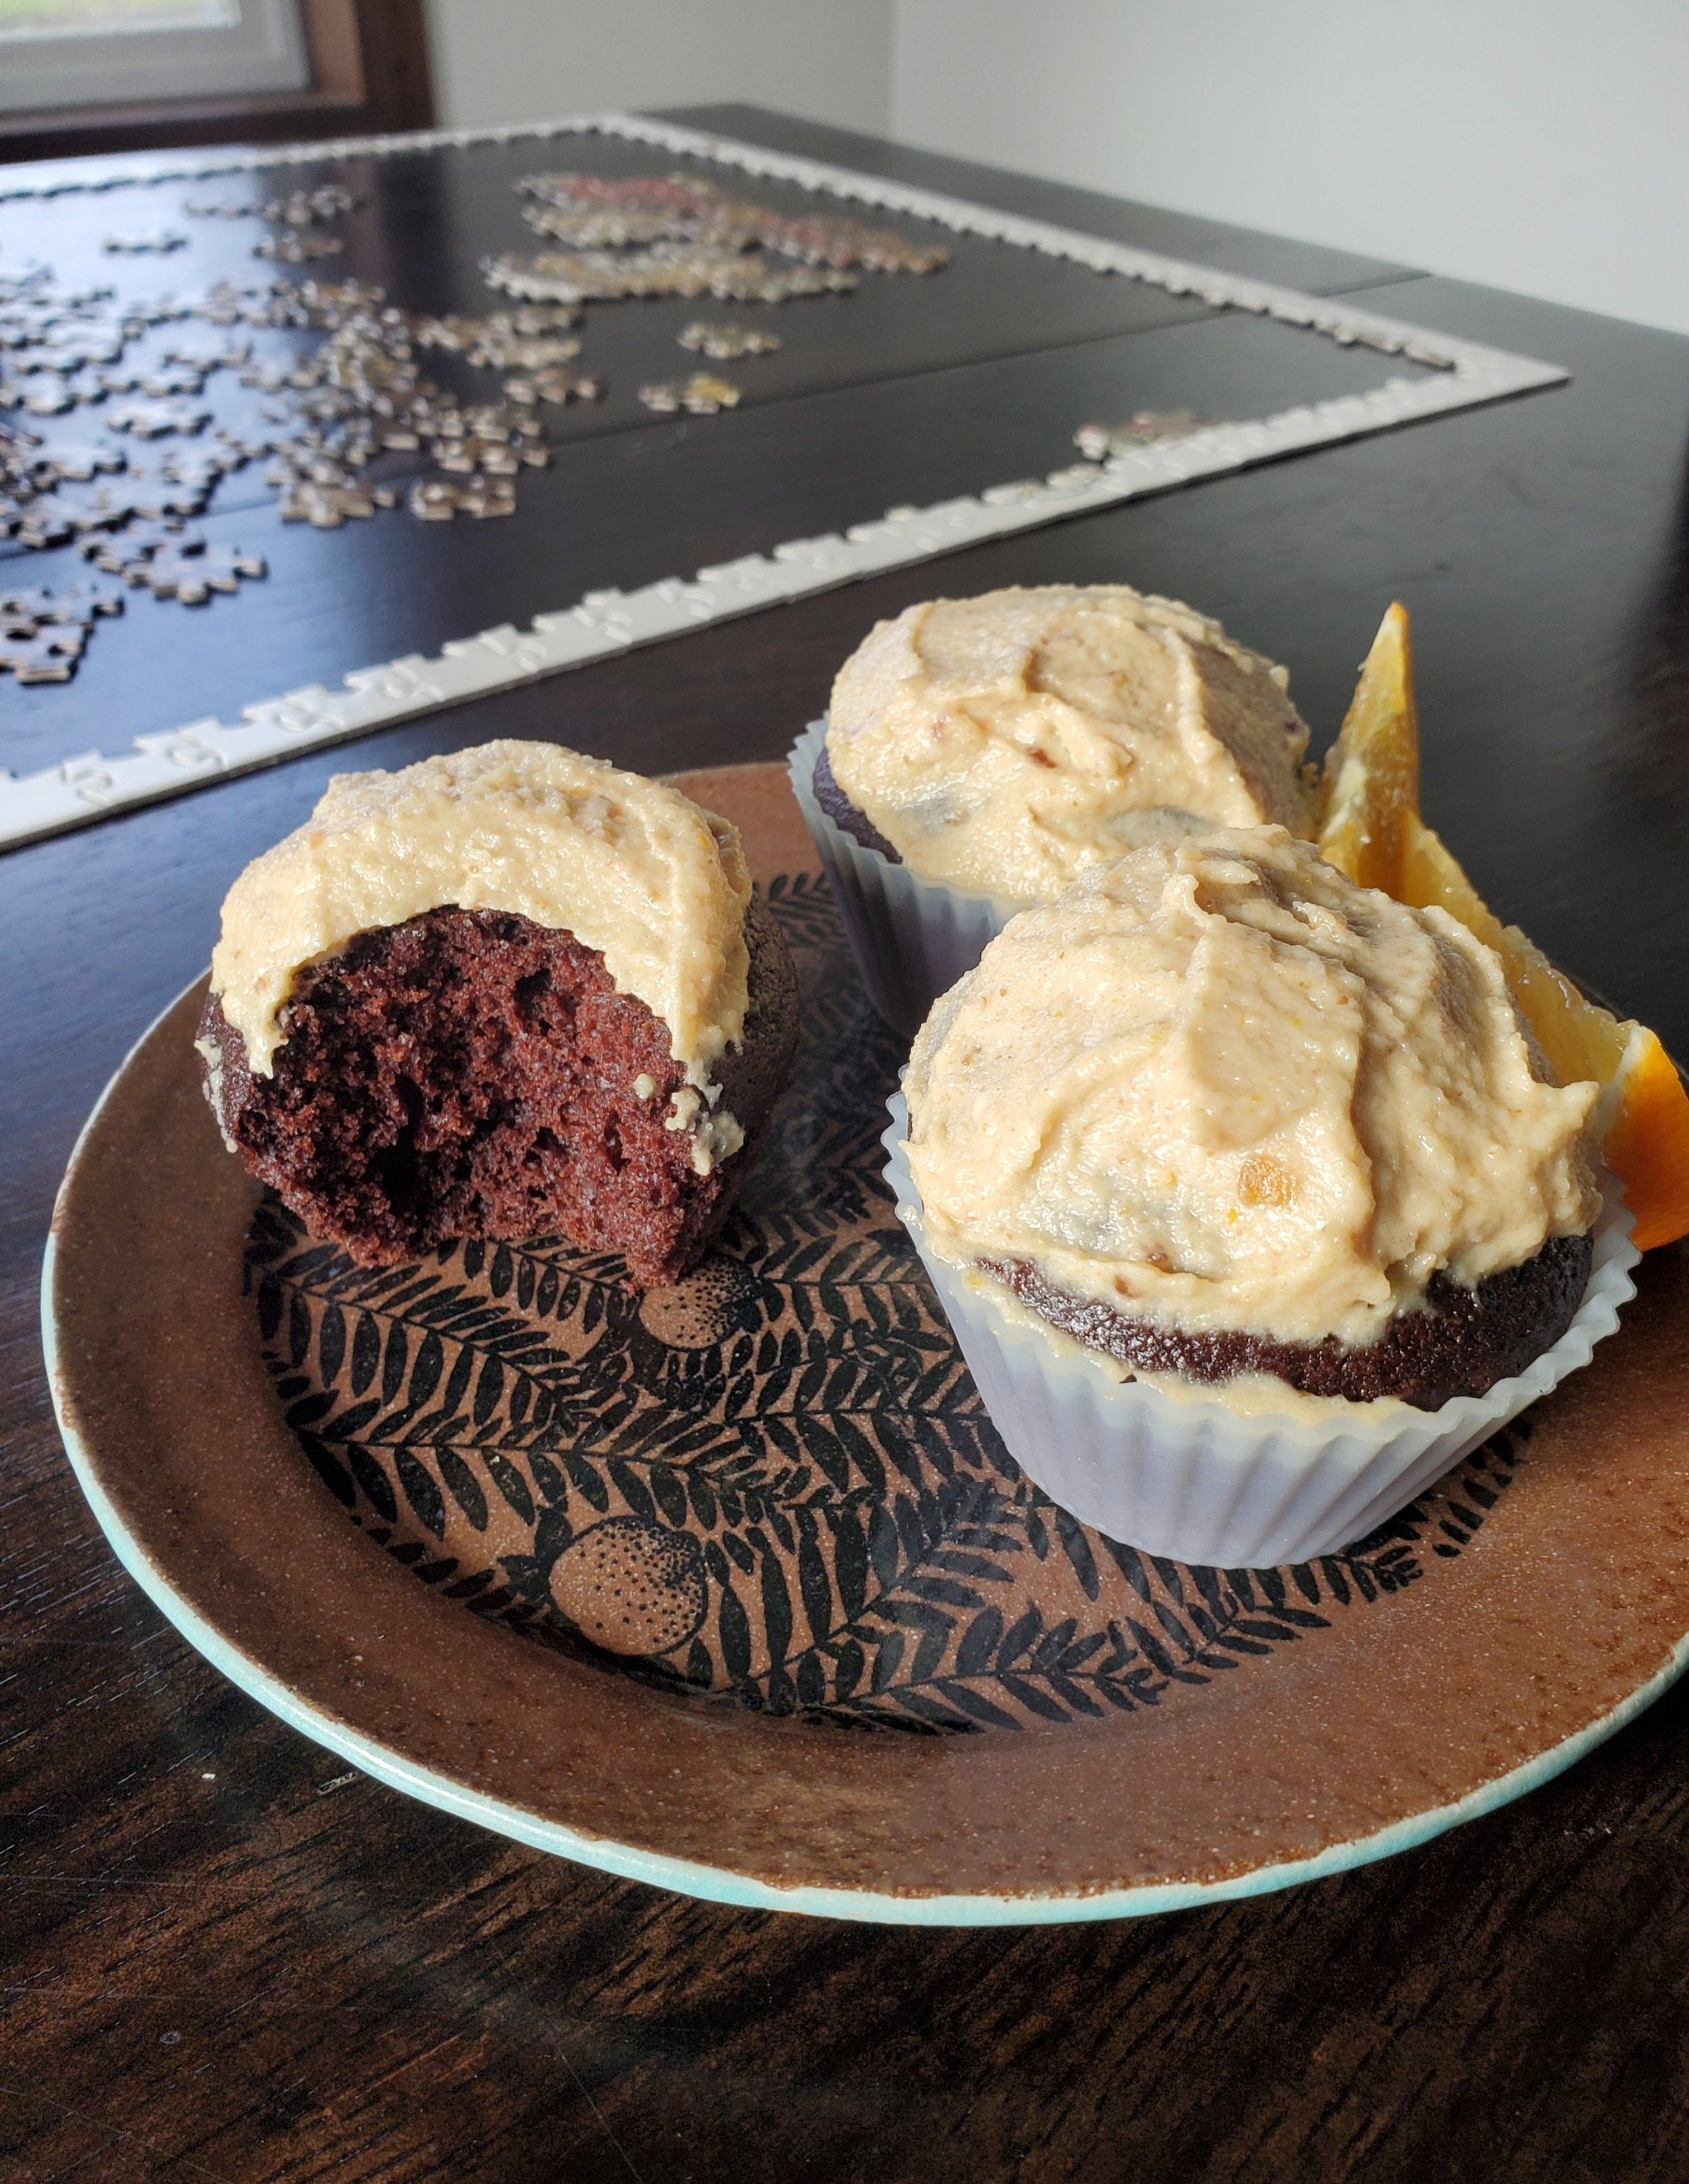
Happy Spring and Happy Birth to Virginia Jean Giopponi, we’re so excited to meet you <3<3<3 We love this chocolate cake with strawberry icing so much. If you love it, you might also really enjoy our chocolate cake with hazelnut frosting.

We have not yet tried a gluten free version of this although we love this gluten-free cake mix, and it would be great with our strawberry icing. While the box mix says cupcakes, it also works great in a cake pan. To make this recipe you would likely want to have two boxes so you could have the two tier cake with frosting in-between.

Pans needed: 2 6-inch round cake pans (if you only have one you can make this in batches it will just take twice as long).

Serves: 4-6 servings

Time: 1 hr

Ingredients

For the cake:

3/4 cup + 2 tbsp all purpose flour

3/4 cup coconut sugar

1/4 cup + 2 tbsp cocoa powder, plus extra for powering the pans

1 tsp baking soda

1/2 tsp baking powder

2 tsp vanilla powder (option to replace with vanilla extract)

1/2 tsp salt

1 room temperature egg

1/2 cup almond milk

1/2 tsp apple cider vinegar

1/4 cup neutral oil

1/2 cup hot coffee

For the icing:

3/4 cup soaked cashews

2 dates

squeeze of lime juice

Lime zest

1 tsp vanilla powder (option to replace with vanilla extract)

3/4 cup pureed strawberries (about 8 large strawberries), plus extra strawberries for topping the cake

1/4 tsp - 1 tsp agave (depending on your sweetness preference)

1/4 tsp salt

up to 1/2 water depending on how thick you want the icing to be. Less water is more fudgy, more water is fluffier. The puree is pretty wet so you may not need any water at all

This cake can be made by hand or with a mixer. We use a mixer because we have one.

Pre-heat the oven to 350 F and make hot coffee. Brush oil into your cake pans and add 1 tbsp of cocoa powder and shake until bottom and sides are coated. Mix the dry ingredients (flour, sugar, cocoa powder, baking soda, baking powder, vanilla powder, salt). In a separate bowl or in a 2 cup liquid measuring cup combine the almond milk, apple cider vinegar, neutral oil, and the egg. Break the yolk up, but no need to whisk the egg. Add this to the dry ingredients and mix until just combined, careful not to over mix. While you are stirring, add the hot coffee and watch it transform into liquid, smooth, velvety cake batter.

Divide the batter between the two cake pans as equally as possible. Bake in a pre-heated oven for about 30 minutes or until you can touch the center of the cake and it bounces back, however it should not be firm and should still have a slight wobble to it. Remove from the oven and let the cakes cool for about 5 minutes.

Wearing hot mitts, pick up the cake and tilt to about 45 degrees. Using the palm of your hand (in the hot mitt) pat the side of the cake pan and then turn the cake pan. Repeat this until you’ve tapped all the way around the pan. Next turn the pan upside-down, turning the cake onto a wire rack, clean counter top, or plate. Then lift the pan off of the cake. Flip your cake over so that the cake is right side up and let it cool completely before frosting.

Drain your cashews and add them, with the rest of the icing ingredients, to the bowl of a food processor. Blend, scraping down regularly until you have a smooth creamy icing. If you find you need to add water, add it 1 tbsp at a time until you have the consistency that you like. The less water you use the more dense it will be, the more water you add the more fluffy the icing will be.

Once your cakes have cooled, place the first cake onto a plate. Using a serrated knife, cut the rounded top of the cake off, just enough to create a flat surface. Generously spread icing onto the top of the first layer. Put the second layer on top, cutting off the top for a cleaner look or leaving it on for a rounded top. Spread icing over the top and sides. To get a smooth finish on your icing, use an icing spatula or knife to spread the icing onto the cake. In between strokes, wipe the icing off the spatula or knife and rinse in hot water. The hot knife will smooth the icing more effectively and stop the knife from creating a peak when you lift it off the icing.

Optionally top the cake with fresh cut strawberries. Cut into slices and enjoy!

Orange Chocolate Cupcakes

If you are gluten free, you can substitute the Simple Mills chocolate cupcake mix and add 1 tsp of orange extract, in addition to the ingredients it already calls for, into the batter. Note: we prefer to make this mix with just two eggs not the three that it calls for. Then frost as usual and enjoy a gluten free version of these delights!

Makes: 12 cupcakes

Time: 1 hr

Ingredients

For the cupcakes:

3/4 cup + 2 tbsp all purpose flour

3/4 cup coconut sugar

1/4 cup + 2 tbsp cocoa powder

1 tsp baking soda

1/2 tsp baking powder

1 tsp vanilla powder (option to replace with vanilla extract)

1 tsp orange extract

1/2 tsp salt

1 room temperature egg

1/2 cup almond milk

1/2 tsp apple cider vinegar

1/4 cup neutral oil

1/2 cup hot coffee

For the icing:

3/4 cup soaked cashews

4 dates

1 tsp orange extract

1 tsp orange zest

1/4 tsp - 1 tsp maple syrup (depending on your sweetness preference)

1/4 tsp salt

1/4 cup orange juice depending on how thick you want the icing to be. Less liquid is more fudgy, more liquid is fluffier.


These cupcakes can be made by hand or with a mixer, however we use a mixer because we have one.

Pre-heat the oven to 350 F and make hot coffee. Either grease the cupcake pans with some neutral oil or line with silicone or paper cups. We like to use silicone cupcake cups in our cupcake pan because they make cleanup easier and you don’t have to throw them away every time. Paper cupcake cups work to line the cupcake pan as well.

Mix the dry ingredients (flour, sugar, cocoa powder, baking soda, baking powder, vanilla powder, salt). In a separate bowl or using a liquid 2 cup measuring device combine the almond milk, apple cider vinegar, neutral oil, orange extract, and the egg. Break the yolk up, but no need to whisk the egg. Add this to the dry ingredients and mix until just combined, careful not to over mix. While you are stirring add the hot coffee and watch it transform into liquid smooth velvety cake batter.

Divide the batter between the cupcake cups as equally as possible. Bake in pre-heated oven for about 22 minutes or until you can touch the center of the cupcakes and it bounces back, however it should not be firm and should still have a slight wobble to it. Remove from the oven and let the cupcakes cool for about 5 minutes. Then transfer them out of the pan onto a cooling rack, if you have one, otherwise the counter or a plate works just fine.

Drain your cashews and add them, with the rest of the icing ingredients, to the bowl of a food processor. Blend, scraping down regularly until you have a smooth creamy icing. For the orange juice, start with 1/4 cup and then add the orange juice 1 tbsp at a time until you have the consistency that you like. The less liquid you use the more dense it will be, the more liquid you add the more fluffy the icing will be.

Spread the icing on the cupcakes,

Enjoy!

Vegan Coconut Custard Pie

Coconut custard pie is one of Camille’s absolute favorites. They love eating it in the morning with a cup of natural coffee or some (oat)milky black tea. This recipe is inspired by the Minimalist Baker (one of Camille’s favorite food blogs). If you want to make their version of the pie you can find it here: minimalist baker’s coconut cream pie.

Makes: 1 pie

Time: 30 minutes active time, 3 hours (or overnight) resting time

Ingredients

For the crust:

1 cup gluten-free rolled oats (optionally sub gluten-free oat flour)

1 cup almond flour

1/4 tsp sea salt

2 tbsp coconut sugar

5 tbsp vegan butter, soy-free option

For the filling:

6 tbsp cornstarch

1/3 cup coconut sugar

1 pinch sea salt

2 cans full fat coconut milk

1 tsp vanilla extract

1/2 cup shredded coconut, plus more for garnish


Pre-heat oven to 350 F and grease a standard size pie dish. If you don’t own one of these, you can use any 8X8 pan, or if you use multiple smaller pans adjust cooking time for crust.

Pulse oats in a high speed blender or food processor until it is the texture of fine flour. If you are using oat flour, you can skip this step. Mix this oat flour with the almond flour, sea salt, and coconut sugar in a bowl. Cut the 5 tbsp of butter into the dry mixture until it the butter is pea sized and you have dough that holds up when you squeeze it between your fingers. The dough may look crumbly. If it crumbles apart completely when you squeeze it, you can work in a bit more butter. Using your hands, press this dough into the pre-greased pie dish until it is an even thickness on all sides. If you find it’s very thick or it seems like you have extra, you can pull this toward the top edge to create thicker edge around the rim. Bake the crust for 15-25 minutes until it is starting to brown and smells cooked. Note, sometimes the crust doesn’t look very much browner to me even when it is fully cooked. Remove and set aside to cool.

When the pie crust is done cooking, or is only 10 minutes away from being done, add the cornstarch, canned coconut milk, coconut sugar, and sea salt to a sauce pan and stir to as smooth a texture as possible (you may not be able to break up all the lumps before you heat it). Add this to medium heat and continue stirring focusing on removing all lumps. Once this starts to boil, cook for about 6 more minutes stirring constantly. The mixture should be bubbling and getting thicker. Use a rubber spatula to keep scraping the bottom and sides to keep the custard from burning. Once the mixture is thicker and looks jiggly, remove from heat and stir in 1/2 cup of shredded coconut and the vanilla extract. Stir this, and then pour it into the pre-cooked pie crust. Garnish with coconut shreds.

Let the pie cool on the countertop until it is room temperature, and then place it in the fridge at least 2-3 hours, ideally overnight, to set up. Note: if you your pie dish is made of glass, be especially careful not to put it in the fridge while still hot. Hot ceramic or glass cookware will break if you move it from cold to hot or hot to cold too quickly. Slice and enjoy!

Granola Bars

These granola bars are chewy, slightly sweet, and texturally pleasing. Biting into a blend of nuts, fruit, and every now and again bonus chocolate chunks is such a joy! Feel free to adjust which dried fruit and nuts you use to maximize your pleasure.

Pans needed: Ideally a 13” x 9” brownie pan (so the sides are about 3 inches tall. You may also be able to do this in a pan with shorter sides however you would need to adjust the cook time.

Serves: 15-20 bars

Time: 1hr 40 minutes (30 minutes active)

Ingredients

2 cups old fashioned oats, gluten free option

1/3 cup coconut sugar

1/2 teaspoon kosher salt

1/2 teaspoon cinnamon

1/2 teaspoon vanilla powder (like this one)

3 cups dried fruits and nuts: my favorite mix is almonds, pecans, dried cranberries sweetened with apple juice, raisins, sunflower seeds, and chocolate chips (I love Hu Gems).

1/3 cup vegetable oil

1/3 cup maple syrup

1 tablespoon water

3 tablespoons almond butter


processed_20210529_173101.jpg

Preheat the oven to 350°F.  Put a piece of parchment paper in a 13" x 9" pan perpendicular to the pan so it hangs over the two long sides.  Grease this and the sides of the pan that remain uncovered with vegetable oil.  


Blend 1/3 cup of the oats in a food processor until it is a rough flour.  Stir together all the dry ingredients in a large bowl.  The blended oats will coat the fruits and keep them from sticking together in a lump.  Pour the oil and water over the mixture and toss gently.  Add the maple syrup and mix until the mixture is a consistent wetness. Warm the almond butter gently to make it easier to pour (this step is easiest done in a microwave and can be skipped if you don’t have one). Stir in the almond butter.  Turn the mixture into the oiled pan and press down to cover the whole bottom of the pan including the corners.  


Bake in the 350°F oven 40 minutes or until the edges are browned.  Remove the pan from the oven and allow to cool on a wire rack for five minutes. Carefully lift the parchment out of the pan and place it on back onto the cooling rack for at least 20 minutes more.  If the bars are cool enough you should be able to remove the parchment paper without the granola bending too much. Cut into bars. There will be crumbly parts and crumbs, but they are just as delicious as the bars. Enjoy!

processed_20210529_184844.jpg

Roasted hazelnut cheesecake

While perfecting this recipe we came to the conclusion that neither of us has had cheesecake with dairy. We cannot attest to how similar this confection is to said food, but it is smooth, creamy, a tad sweet, and is reminiscent of chocolate hazelnut butter. Right now the crust is slightly sweet with a less sweet filling and is perfect for our tastes, but if you enjoy a sweeter experience, feel free to increase the maple syrup in the filling. Or, if you use store bought chocolate hazelnut butter this will likely have sugar and can be another way to increase sweetness in the filling.


Pans needed: 4” springform pan

Makes: One 4” cheesecake

Time: 30 minutes active time; 4 hrs total

processed_20210212_162130.jpg

Ingredients

For the crust:

⅓ c pecans

⅓ c dates

½ tsp salt


For the filling:

1 c soaked cashews

½ c almond milk plus additional for blending

⅓ c roasted hazelnut butter (optionally substitute for chocolate hazelnut butter)

2 tbsp melted cacao butter

2 tbsp raw cacao powder

2 tbsp maple syrup

½ tsp vanilla powder or extract


For the toppings (optional):

cacao nibs

hazelnuts

chocolate chips


In a food processor, mix all the “for the crust” ingredients until they are sticky and able to form a crust. There will still be some small chunks, that is ideal. Be careful not to over-mix since if you mix too much you will end up with nut butter (which is delicious but will not form a crust). Press the crust mixture into the bottom of your springform pan and set in the refrigerator.

In a blender, blend all of the “for the filling” ingredients using the tamper as you blend. If needed, add additional almond milk one tablespoon at a time (we used 2 additional tablespoons) until the mixture is fully blended.  Blend until smooth and then pour onto the crust. Put this in the freezer for at least 3 hours.

Remove from freezer 1 hour before serving. If you plan to top with chocolate drizzles, melt the chocolate chips in the microwave or a double boiler. Optionally top with cacao nibs and chopped hazelnuts. Drizzle with melted chocolate chips and enjoy!

Note: When we are removing the cheesecake filling from the blender we inevitably cannot get everything out — there is always a thin film of chocolate hazelnut stuck to the sides and bottom. Before cleaning the blender, we like to blend these leftovers with almond milk for some chocolate milk for us to enjoy while we finish making the cake.

processed_20210212_161956.jpg

Vegan Chocolate Chip Cookies

Sometimes I think about how much I love being an adult. Cookies are one of the things that remind me how awesome it can be to be “grown up”. When I was super little, cookies were these magical delicacies that I would scheme over. I was always wondering, how do I get more of these? As an adult I can buy them or make them whenever I want! It’s magical and I love it! For adults and children alike, if you can eat gluten we bet you will love these.

20201122_135745.jpg

Makes: 1 dozen

Time: 1 hour (15 min active)

Ingredients

1 tbsp flax meal + 2 tbsp water

1/2 cup vegan butter (we recommend Miyokos)

3 tbsp almond butter

1/2 cup coconut sugar

1 cup + 2 tbsp flour

1/2 tsp baking soda

1/2 tsp salt

1/2 tsp vanilla

1 cup chocolate chunks

flaky salt, optional


Mix ground flax & water and set aside.

In a large bowl cream the butter, almond butter, and sugar together until smooth. Add the flax egg and stir until combined. Fold in the flour, baking soda, salt, and vanilla until barely combined, there will still be some patches of flouriness. Next fold in your chocolate chips until the flour just disappears. Put the dough in the fridge and pre-heat the oven to 375 F.

Line a cookie sheet with a silpat or parchment paper. Once the oven is pre-heated, remove the dough from the fridge and spoon even portions onto a cookie sheet leaving space in-between the cookies. This recipe should give you between 10-12 cookies. At this point, if you are using flaky salt, sprinkle it over the cookies. We think it tastes equally good with or without the flaky salt garnish. Bake 15-18 minutes rotating once in the middle. Remove from the oven and cool. Enjoy!

Fudgy Double Chocolate Gluten-Free Vegan Brownies

Camille and Anne used to go to church together. As children there were two things that we loved most about church: choir and coffee hour. Choir meant we got to sit in the choir loft, sing, and giggle together as we would dare each other to drop things on people below us. Coffee hour was a chance to take lots of delicious food and then hide in the trees hoping our parents wouldn’t find us and we could play together all day. Our favorite treats were lemon poppy seed cake and brownies. We would often take the brownies, ball them up in our hands and smoosh them until they turned into little fudgy morsels of joy and then eat them. This memory inspired Anne to create a gluten-free vegan version so that we could both enjoy them as adults. Camille thinks these taste like food made for angels.

Happy New Year, y’all!

processed_20200729_161344.jpg

Serves: 6-8

Time: 45 min (15 min active)

Ingredients

2 tbsp ground flax

1 cup almond milk

3/4 cup gluten-free oats

2/3 cup almond flour

2/3 cup raw cacao powder

2 tsp baking powder

1/2 tsp vanilla powder or vanilla extract

1/4-1/2 tsp fine salt

1/2 cup neutral oil

2/3 cup coconut sugar

1 tsp apple cider vinegar

1/3 cup chocolate chips, we recommend Hu Gems

1/2 tsp flaky salt


Pre-heat oven to 350 F and oil a 9 x 9 baking dish. Mix ground flax and almond milk in a small bowl and set aside.

In a blender or food processor, pulse oats until floury. Add the oat flour to a large mixing bowl with almond flour, raw cacao powder, baking powder, and fine salt. The reason the salt is a range is that different salts have different levels of saltiness. We recommend 1/2 tsp if you are using kosher salt and 1/4 tsp if you are using table salt. If you aren’t sure, start with less salt. Once the batter comes together you can taste and salt to taste. Stir to combine. If you are using vanilla powder, add it to the dry ingredients

In a smaller bowl, mix the oil, coconut sugar, vanilla (if using extract), apple cider vinegar, and the flax/almond mixture. Stir to incorporate.

Make a well in the dry ingredients and add wet mixture, stirring until fully mixed. You don’t have to worry about over mixing because there is no gluten. Fold in the chocolate chips and pour into oiled baking dish. Taste the batter and feel free to add more salt if it needs it. You will be adding flaky salt on top, so be careful not to over-salt. Top with flaky salt and bake for 30 minutes or until knife comes out clean.

Allow to fully cool (this is part of the cooking process). Slice and enjoy!

Watermelon Slushie

This August we are soaking in the heat and all the delicious watermelon. If you have a Vitamix and a tamper (an attachment for the blender that allows you to push the things you are blending into the blades while it is running), here is another delicious way to consume your watermelon! We prefer different levels of sweetness, so the agave is optional. Make sure to taste and add sweetener to the level you prefer.

processed_20200725_144451.jpg

Makes: 16 oz

Time: 15 minutes (but the watermelon needs at least a night to freeze)

Ingredients

2 heaping cups cubed frozen watermelon

3/4 coconut water (or sub tap water)

1 tsp agave (optional)

1 pinch salt

Heavy squeeze lime

1/4 cup loosely packed mint leaves


Add all the ingredients in blender and blend until smooth. Serve and enjoy!

Chocolate Cake with Hazelnut Frosting

Hi, this is Anne writing the intro.

Today would have been my father’s 104th birthday so we are sharing a chocolate cake recipe with you all to celebrate. When I was a kid, probably about the age of 12, my father started putting a box of cake mix and a jar of icing at my place at the table the morning of his birthday. He loved cake, but I suppose he didn’t think that he should have to bake his own birthday cake. So from a young age it was my job to make sure he had a cake each year for his birthday, and he would remind me with the box of cake mix. My father passed away 12 years ago now, and the first year after he was gone his birthday rolled around and I was in the middle of a move and felt like I couldn’t do justice to the day. But a few days later I baked a chocolate cake in his memory. It’s now a tradition for me. I bake a cake on my father’s birthday, and over the years I have developed this recipe for a chocolate cake with chocolate hazelnut frosting. When I first started to modify the recipe so that it would feel better in my body I felt like I was betraying him. I worried that he wouldn’t approve of the changes, but over time I realized that the cake isn’t for him. It’s for me, a way to recognize my grief. Grief is a funny thing. For years, every day I wished that I could call my father, hug him, bake for him, cook for him, or just know he was still in the world. There were many times when something exciting happened in my life and I thought I should call him, before remembering that was not an option for me anymore. These days I still miss him, I still love him, but I go weeks or months without feeling the pain of his loss. I make a point of remembering him every year on his birthday with this cake, and I hope you will join me in celebrating this day.

This recipe calls for roasted hazelnuts and coconut sugar. If you can only find raw hazelnuts you can roast them at home in the oven in about 15-20 minutes. Put them on a baking sheet in a 350 F oven and give them a stir or shake every five minutes until the skins are darker brown. Coconut sugar is sold under multiple names including coconut palm sugar and brown coconut sugar. Any variation would work in this recipe including replacing with cane sugar, date sugar, or maple sugar.

processed_20200628_191802.jpg

Pans needed: 2 6-inch round cake pans (if you only have one you can make this in batches it will just take twice as long).

Serves: 4-6 servings

Time: 1 hr

Ingredients

For the cake:

3/4 cup + 2 tbsp all purpose flour

3/4 cup coconut sugar

1/4 cup + 2 tbsp cocoa powder

1 tsp baking soda

1/2 tsp baking powder

2 tsp vanilla powder (option to replace with vanilla extract)

1/2 tsp salt

1 room temperature egg

1/2 cup almond milk

1/2 tsp apple cider vinegar

1/4 cup neutral oil

1/2 cup hot coffee

For the icing:

3/4 cup roasted hazelnuts

3/4 cup soaked cashews

4 dates

1/4 cup cocoa powder

1 tsp vanilla powder (option to replace with vanilla extract)

1 tbsp maple syrup

1/4 tsp salt

1/4-1/2 water depending on how thick you want the icing to be. Less water is more fudgy, more water is fluffier.


processed_20200628_165410.jpg

This cake can be made by hand or with a mixer, however we use a mixer because we have one.

Pre-heat the oven to 350 F and make hot coffee. Spread oil into your cake pans and add 1 tbsp of cocoa powder and shake until bottom and sides are coated. Mix the dry ingredients (flour, sugar, cocoa powder, baking soda, baking powder, vanilla powder, salt). In a separate bowl or using a liquid 2 cup measuring device combine the almond milk, apple cider vinegar, neutral oil, and the egg. Break the yolk up, but no need to whisk the egg. Add this to the dry ingredients and mix until just combined, careful not to over mix. While you are stirring add the hot coffee and watch it transform into liquid smooth velvety cake batter.

Divide the batter between the two cake pans as equally as possible. Bake in pre-heated oven for about 30 minutes or until you can touch the center of the cake and it bounces back, however it should not be firm and should still have a slight wobble to it. Remove from the oven and let the cakes cool for about 5 minutes.

Wearing hot mitts, pick up the cake and tilt to about 45 degrees. Using the palm of your hand (in the hot mitt) pat the side of the cake pan and then turn the cake pan. Repeat this until you’ve tapped all the way around the pan. Next turn the pan upside-down, turning the cake onto a wire rack, clean counter top, or plate. Then lift the pan off of the cake. Flip your cake over so that the cake is right side up and let it cool completely before frosting.

Put roasted hazelnuts in your food processor and blend, stopping to scrape down the sides regularly until you have hazelnut butter. Drain your cashews and add them, with the rest of the icing ingredients, to the food processor. Blend, scraping down regularly until you have a smooth creamy icing. For the water, start with 1/4 cup and then add the water 1 tbsp at a time until you have the consistency that you like. The less water you use the more it will be like Nutella, the more water you add the more fluffy the icing will be.

Once your cakes have cooled, place the first cake onto a plate. Using a serrated knife, cut the rounded top of the cake off, just enough to create a flat surface. Generously spread icing onto the top of the first layer. Put the second layer on top, cutting off the top for a cleaner look or leaving it on for a rounded top. Spread icing over the top and sides. To get a smooth finish on your icing, use an icing spatula or knife to spread the icing onto the cake. In between strokes on the cake, wipe the icing off the spatula or knife and rinse in hot water. The hot knife will smooth the icing more effectively and stop the knife from creating a peak when you lift it off the icing.

Cut into slices and enjoy!

CulverAnne1987.jpg

Sweet N Salty Pitaya Bowl

This week our hearts are heavy and our bodies are exhausted as we continue the process of unlearning. We didn’t mention the 4th of July (Independence Day here in the U.S.) last week because we didn’t remember that it was coming up. Camille has many fond memories of celebrating this day with food, fireworks, and family. Never once did she stop think what this holiday is actually celebrating. She was taught that we were celebrating a great feat of independence, but today we are wondering independence for whom? While the core values claimed by the Declaration of Independence ‘life, liberty, and the pursuit of happiness’ seem worthy of pursuit, the fact is that it was only White cis-gendered heterosexual Christian colonists who were meant to receive these benefits. On July 4th, 1776 when the colonies adopted the Declaration of Independence chattel slavery was both legal and integral to the economy of the colonies. As the settlers claimed independence from the British Empire, we did so on stolen lands while committing genocide of indigenous people. This year we are seeing amazing protests sweep the world asking that our institutions stop killing Black people because of the color of their skin. While in 2020 chattel slavery isn’t supposed to exist anymore the prison industrial complex partners with police brutality to a similar affect. Feeling lost at how to reply to well-intentioned folks wishing her “happy 4th of July”, Camille used Rachel Cargle’s wise words “happy for who?”.

We are sitting with the questions of how to hold all of this knowledge. How do we hold the fond memories, the love of the values that should be core to our existence as a country, and also the death and brutality that this nation is built on. And, as we face this knowledge, how do we move forward? What do we do now that we know this? If you’re also having these thoughts reach out to us through email or text. If you’re also wondering how to hold the complexity of the life we are living, we are too. Let’s do this together.

This week we are celebrating with gratitude the full moon, the long July nights, and having fresh berries in season! In honor of these berries we’ve decided to share Camille’s favorite pitaya bowl recipe. We recognize that this bowl will be pretty expensive if you don’t already have a number of these ingredients on hand, and we don’t recommend trying to make it without a Vitamix with a tamping attachment. Feel free to play around with your own base and toppings and let us know what you love best!

We cook at home for a number of reasons including the pandemic, food allergies, money, and our love of cooking. Also, sometimes it makes more sense to eat out. For example, some recipes require so many ingredients that buying all of them to make one dish is very expensive and creates a lot of waste. For us, pitaya bowls often fall in the ‘makes more sense to eat out’ category. However, if you do want to make pitaya bowls from scratch at home, have some money to spend on ingredients, and have a Vitamix blender with tamping attachment then we highly recommend this pitatya recipe. It is sweet, fruity, salty, hearty, and delicious!

IMG_3673.jpeg

Time: 15 minutes

Serves: 1

Ingredients

for the pitaya base:

6 oz almond milk

6 oz frozen banana (if you have 24 hours you can chop your own banana and freeze the night before)

6 oz frozen mango

1 pack of frozen pitaya

1 tbsp chia seeds (optional)

1 tsp maca root powder (optional)

for the topping:

1/2 cup granola (gluten-free option)

2 tsp coconut oil, melted (optional)

1/4 tsp spirulina powder (optional)

1/2 banana, sliced

2 strawberries, sliced

12 blueberries (roughly)

1 tbsp chopped salted almonds, lightly toasted

2 tbsp peanut butter (we love Once Again for the flavor)

1 tbsp coconut flakes

2 tbsp coconut whip cream

1 tsp bee pollen (optional)

honey drizzle (as much/little as you like, if you don’t have coconut whip you might want extra honey)


IMG_3671.jpeg

If you want to experience the spirluna coconut ‘shell’ then start by melting the coconut oil and stir in the spirulina powder. If you aren’t using this you can start by slicing your almonds, and toasting them lightly in a dry pan.

Put all the pitaya base ingredients in Vitamix blender and blend on high using tamper to make sure everything gets fully incorporated. Be careful not to over-blend. Aim for a sorbet-like texture.

To assemble, layer the granola then the pitaya base. Next drizzle the warm coconut oil/spirulina mixture over the pitaya base (optional). As it cools it will form a coconut oil shell. On top of this, put sliced banana, sliced strawberry and blueberries around the bowl. Add the peanut butter in a clump and the coconut whip cream in a clump. Sprinkle the toasted almonds on top of the peanut butter and then sprinkle the whole bowl with coconut flakes. Top the whip cream with the bee pollen and then drizzle the entire bowl with local honey. Enjoy!

IMG_3669.jpeg

Cardamom Mango Smoothie

Anne first had a mango lassi when they were twelve and loved it. Their body does not enjoy mango lassis made the way that first one was made, but this mango smoothie is reminiscent and delicious without the ingredients that don’t work for our bodies. Feel free to play around and make it your own!

processed_20200416_135715.jpg

Serves: 1 16 oz drink

Time: 10 minutes

Ingredients

1 cup (8 oz) of your preferred non-dairy milk (soy-free option, nut-free option)

3/4 cup frozen mango

3 - 6 pitted medjool dates, pits removed

1/2 tsp freshly ground cardamom


Add nut milk and dates to a high speed blender and blend until the dates have incorporated into the liquid. Add mango and cardamom and blend until smooth. Enjoy!